Payments
Overview
Repair Bay Evolution gives you three ways to collect payment on invoices:
- On-site card payments (Stripe Terminal) — Swipe, tap, or insert a card using a physical card reader at your front desk.
- Online payments — Send a Stripe-hosted payment link via email or SMS. Customers pay from their phone or computer.
- Offline payments — Record cash, check, or bank transfer payments manually.
All payment methods are tied to the same invoice system, so your records stay consistent regardless of how a customer pays.
Payment Options at a Glance
| Method | Requires | Best For |
|---|---|---|
| Stripe Terminal (on-site) | Stripe Connect + registered card reader | Walk-in customers paying at pickup |
| Online (Stripe invoice) | Stripe Connect + customer email | Remote payments, insurance payments |
| Offline | Nothing — always available | Cash, check, bank transfer |
Terminal Setup
Prerequisites: You must have Stripe Connect active in Company Settings before setting up a terminal. See the Stripe Payments setup guide.
Create a Location
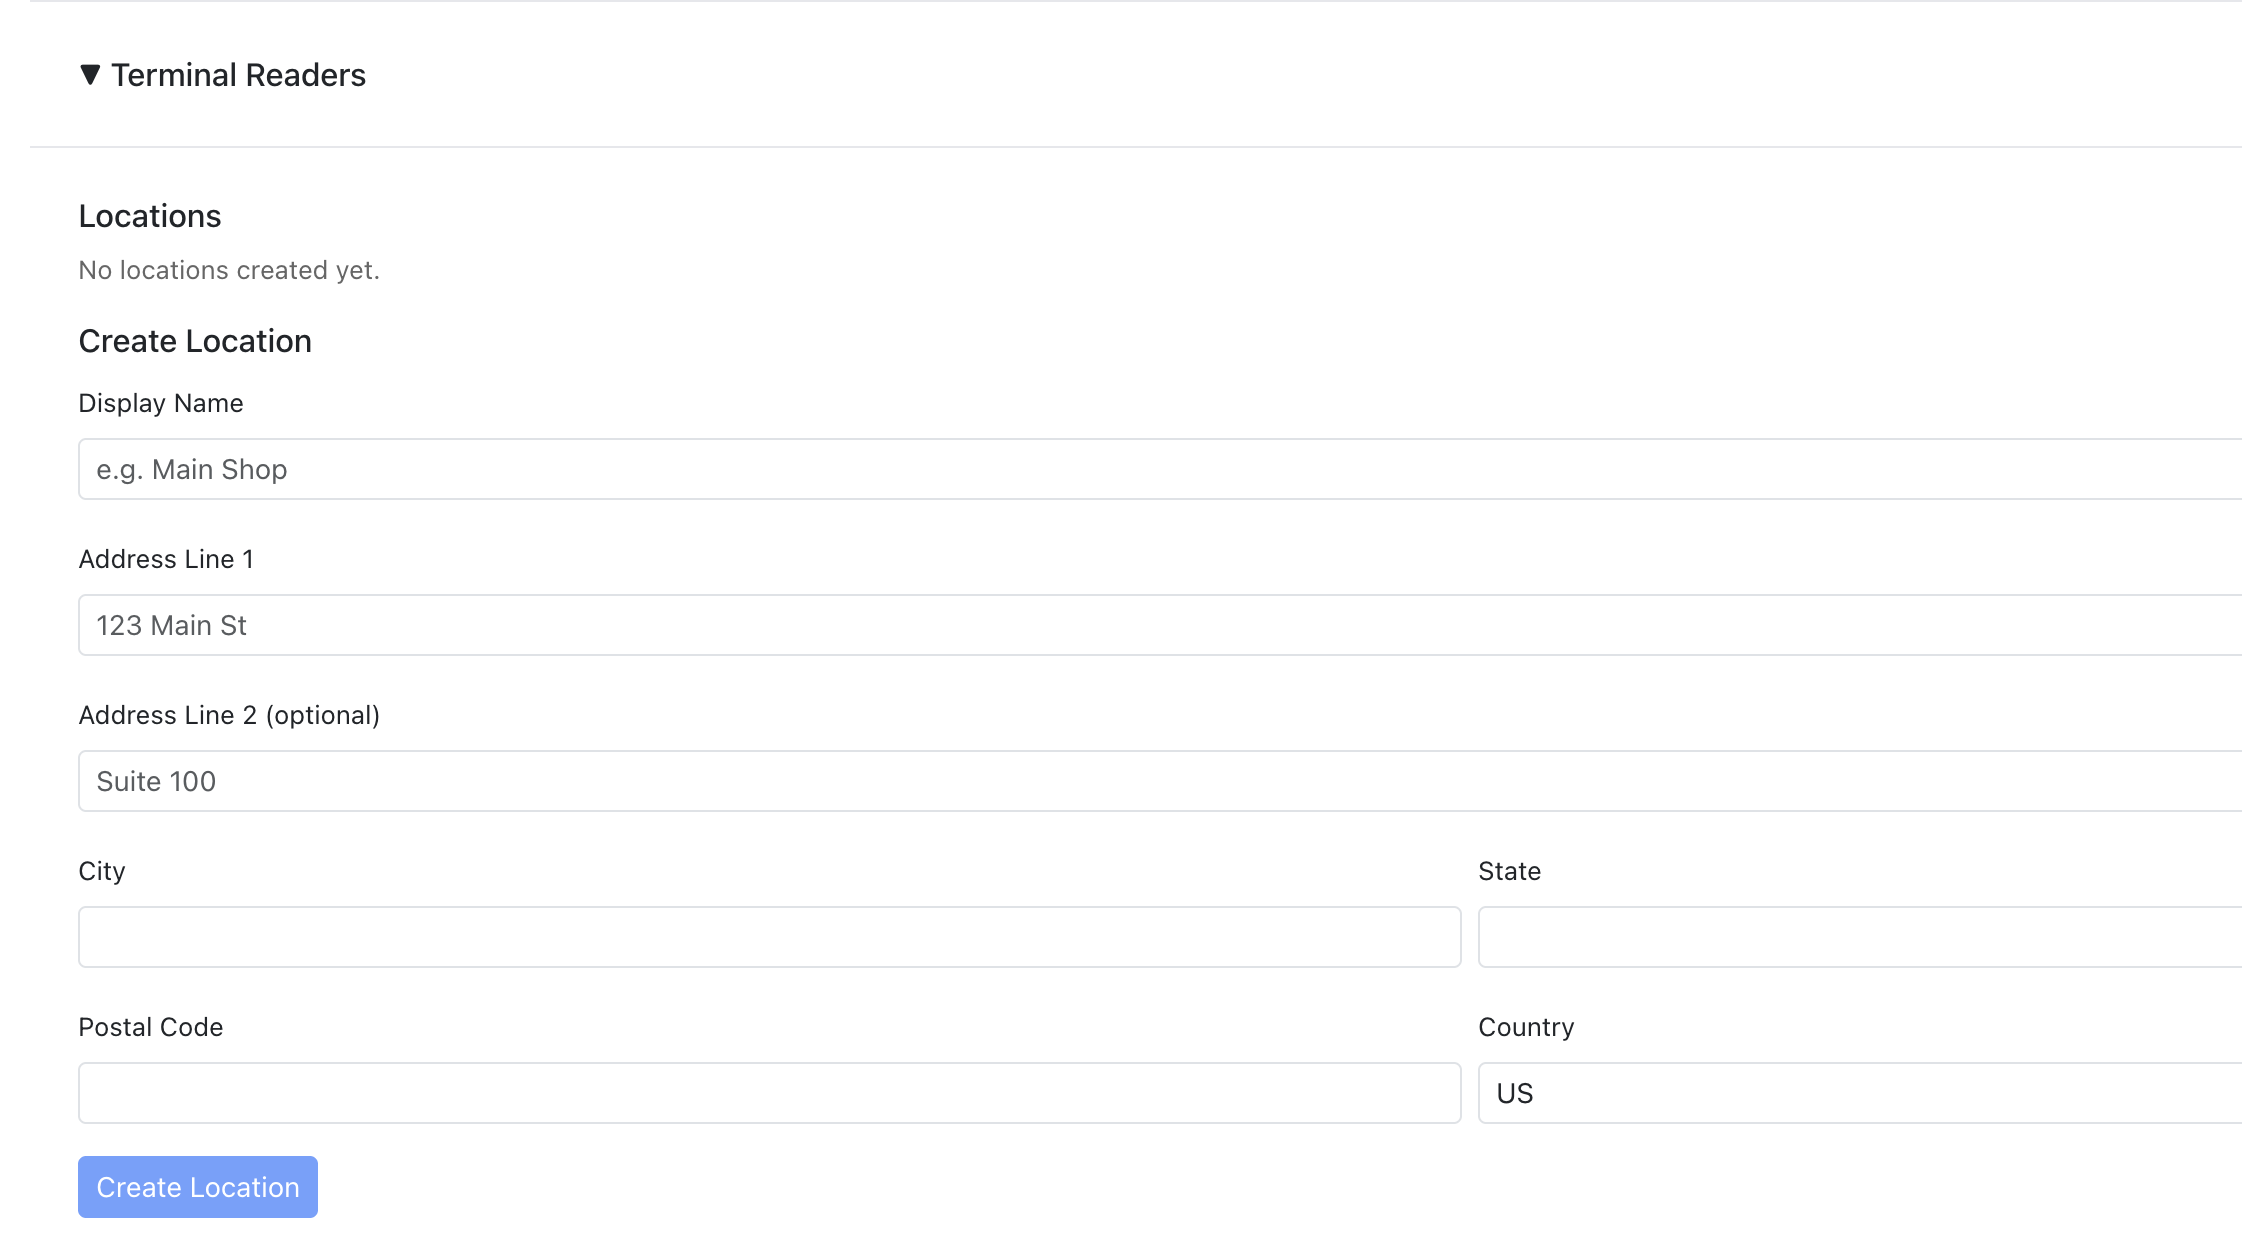
Stripe Terminal requires at least one location (your physical shop address) to associate with card readers.
- Go to Company Settings → Stripe Payments → Terminal.
- Click "Add Location".
- Enter a display name (e.g., "Front Desk") and your shop's address.
- Click "Create Location".
You can create multiple locations if you have more than one shop or want separate readers at different desks.
Compatible Hardware
Repair Bay Evolution uses Stripe Terminal in internet-connected mode. You must use a screen-enabled smart reader that connects directly to the internet via Wi-Fi or Ethernet. Bluetooth-only devices are not supported.
Supported Readers
- BBPOS WisePOS E — Compact countertop reader with touchscreen. Wi-Fi connected.
- Stripe Reader S700 / S710 — Stripe's own smart reader with a large display. Wi-Fi or Ethernet.
- Verifone smart readers — V660p, P630, M425. Internet-connected countertop devices.
When purchasing a reader, look for "smart reader" or "internet-connected" in the Stripe hardware catalog. The reader must be able to display a registration code on its own screen during setup.
Register a Card Reader
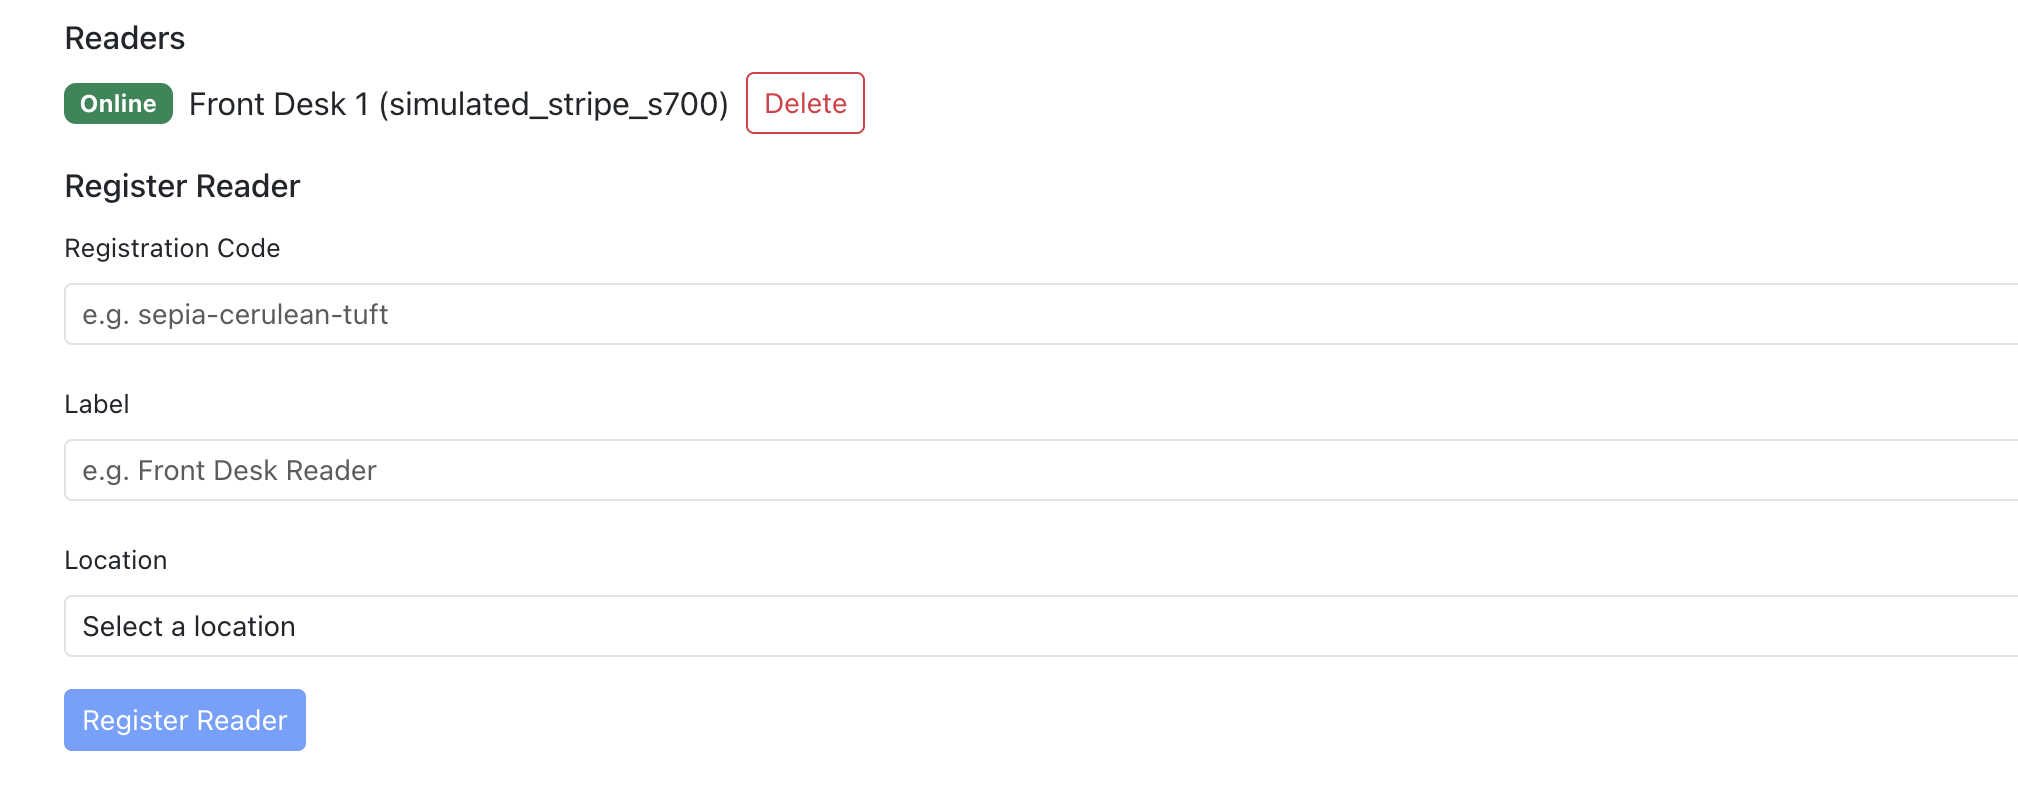
Once you have a location, you can register a Stripe Terminal card reader.
- Power on your Stripe card reader and follow its on-screen setup to get a registration code.
- In Repair Bay Evolution, go to Company Settings → Stripe Payments → Terminal.
- Click "Register Reader" under your location.
- Enter the registration code displayed on your reader.
- Give it a label (e.g., "Front Desk Reader").
- Click "Register".
After registration, the reader appears in your reader list with its connection status. You can check if a reader is online at any time.
Collect On-Site Payment
With a registered reader online, you can collect card payments directly from an invoice.
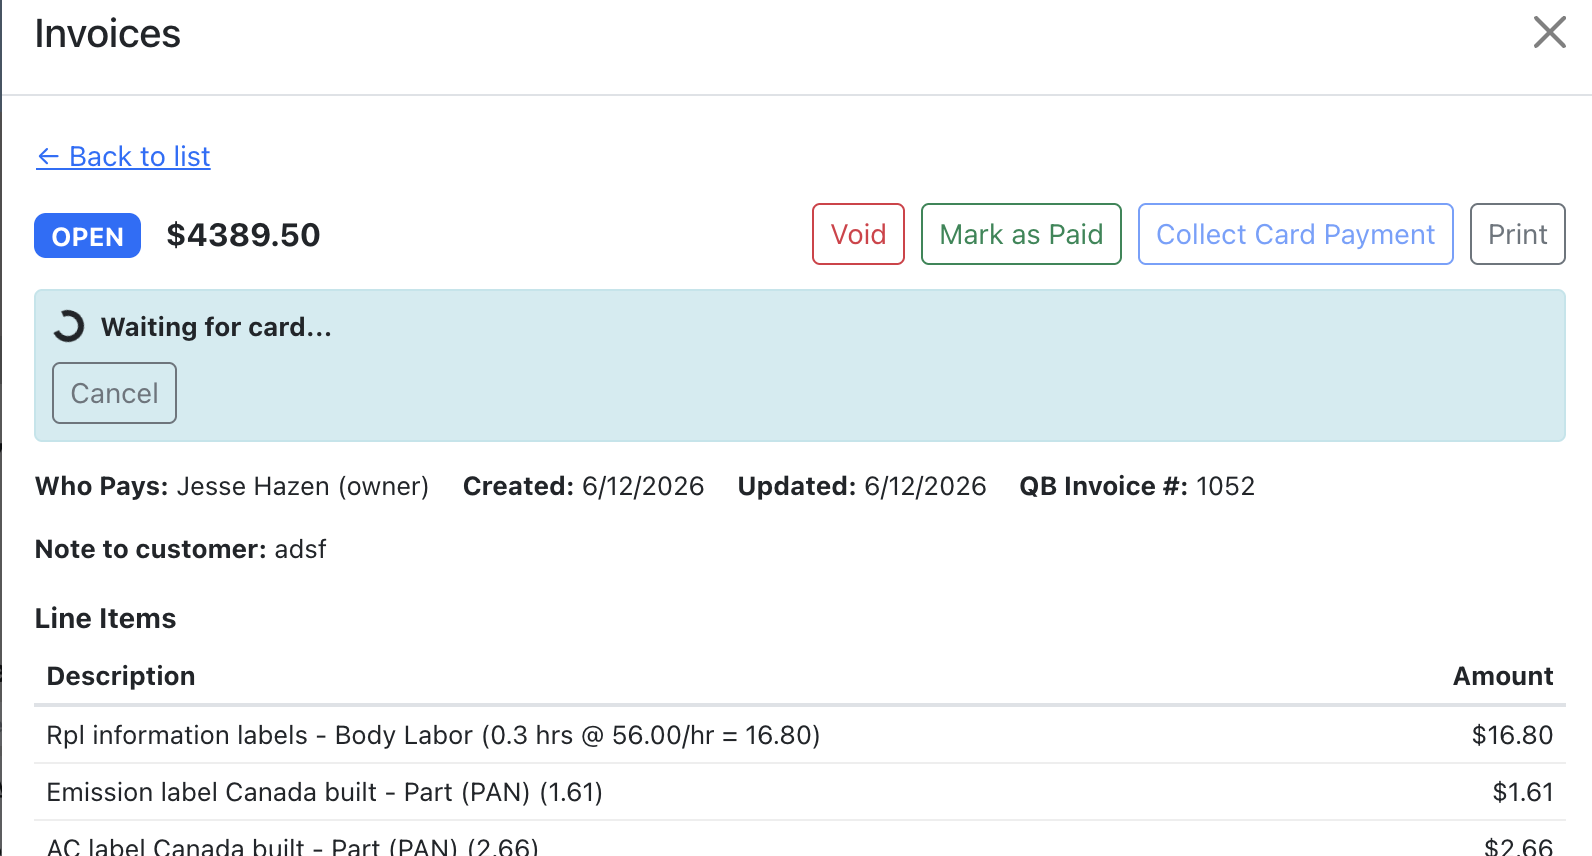
- Open the invoice you want to collect payment on (must be in "Open" status).
- Click "Collect Payment" (the card reader icon).
- Select which reader to use from the dropdown.
- The reader prompts the customer to tap, insert, or swipe their card.
- Once the payment succeeds, the invoice is automatically marked as paid with the card brand and last four digits recorded.
Payment processing typically takes 5–15 seconds. The screen shows a progress indicator while the reader processes the card.
Cancel a Payment
If you need to cancel a payment that's in progress (e.g., wrong invoice, customer changed their mind):
- Click "Cancel" while the reader is waiting for a card.
- The reader cancels the pending action and returns to idle.
If no action is in progress on the reader, the cancel button simply clears the state.
Online Payments
For customers who aren't physically at your shop, send the invoice online:
- Create a Stripe invoice on the job (see Create an Invoice).
- Click "Send Invoice" — this emails a Stripe-hosted payment page to the customer.
- Alternatively, click "Copy Payment Link" to share the URL via text or chat.
- When the customer pays online, the invoice automatically updates to "Paid" in the app.
Offline Payments
For cash, check, or bank transfer:
- Open the invoice detail view.
- Click "Mark as Paid".
- Select the payment method (Cash, Check, Bank Transfer, or Other).
- Optionally add payment notes (e.g., check number).
- Click "Confirm Paid".
For more details, see the Mark as Paid section in the Invoices guide.