Company Settings
Overview
Company Settings is where admins configure shop-wide defaults. Access it from the side menu → Manage Company. Each section is expandable, and some group related settings into sub-sections (for example, Pricing holds Material Charges and Markup Matrices; Accounting holds Payment Accounts and QuickBooks; Scheduling & Booking holds Business Hours, Appointment Tags, and online booking).
Several areas have their own in-depth guides. Where that's the case, the section below links straight to it rather than repeating the details.
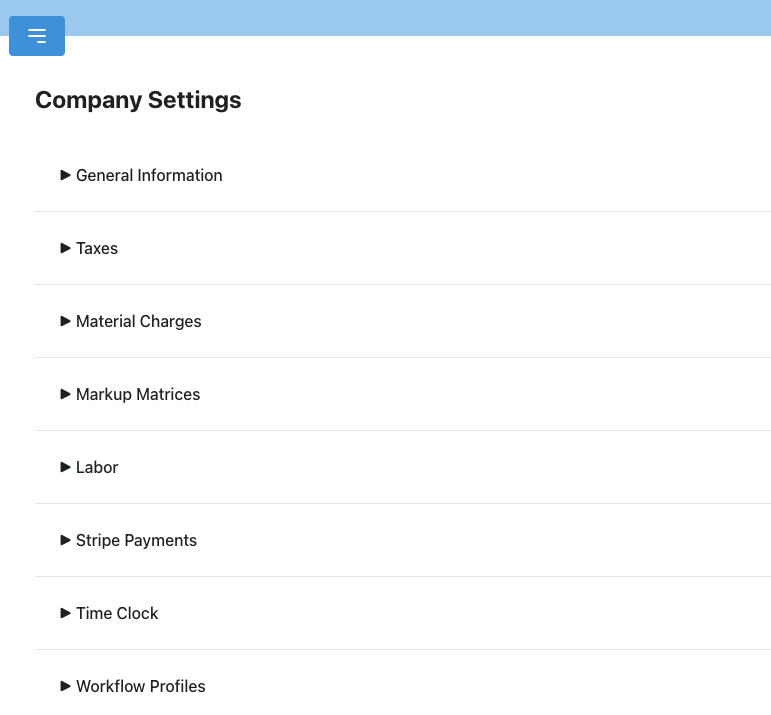
General Information
Set your company name and other basic information.
Shop Logo
Upload your shop logo to brand your estimates, invoices, and customer emails. Your logo appears on:
- Estimate emails — Shown at the top of the email when you send an estimate to a customer.
- Estimate approval page — Displayed on the public page where customers review and approve estimates.
- Invoice print view — Shown in the header when you print an invoice.
- Media sharing emails — Included at the top when you email photos or documents to a contact.
- General outbound emails — Shown in emails sent from the messaging tab.
Upload Your Logo
- Go to Settings → Company Settings.
- Expand the General Information section.
- Click "Upload Logo" and select your image file.
- The logo is saved and will appear on all outbound communications going forward.
Recommended Specs
- Format: PNG or JPG (PNG recommended for logos with transparency).
- Size: At least 400×200 pixels for crisp display. The system will scale it down to fit (max display size: 200px wide × 60px tall).
- Aspect ratio: Horizontal/landscape logos work best. Tall or square logos will be constrained to 60px height.
- File size: Under 2 MB for fast loading.
Stripe Logo
If you use Stripe for invoicing, you should also upload your logo in your Stripe Dashboard under Settings → Branding. This ensures your logo appears on Stripe-hosted payment pages and receipts. The Repair Bay logo and the Stripe logo are managed separately.
Taxes
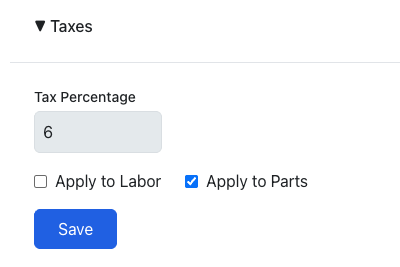
Configure your tax percentage and choose whether tax applies to labor, parts, or both. When new parts or labor are added to a job, they will automatically inherit these taxable defaults.
- Expand the Taxes section.
- Set the tax percentage.
- Check "Apply to Labor" and/or "Apply to Parts".
- Click Save.
Pricing
The Pricing section groups settings that control how your shop marks up costs. Expand Pricing to see two sub-sections: Material Charges and Markup Matrices.
Material Charges
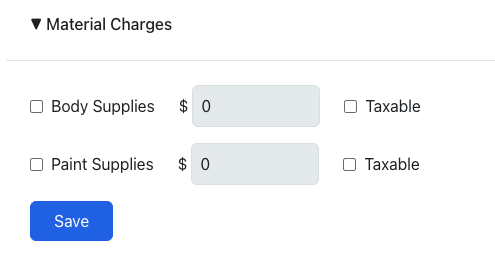
Set company-wide defaults for body supplies and paint supplies rates. These defaults are used when creating new jobs. Individual jobs can override these values.
- Expand the Pricing section, then expand Material Charges.
- Enable Body Supplies and/or Paint Supplies.
- Set the per-hour rate and taxable status for each.
- Click Save.
Markup Matrices
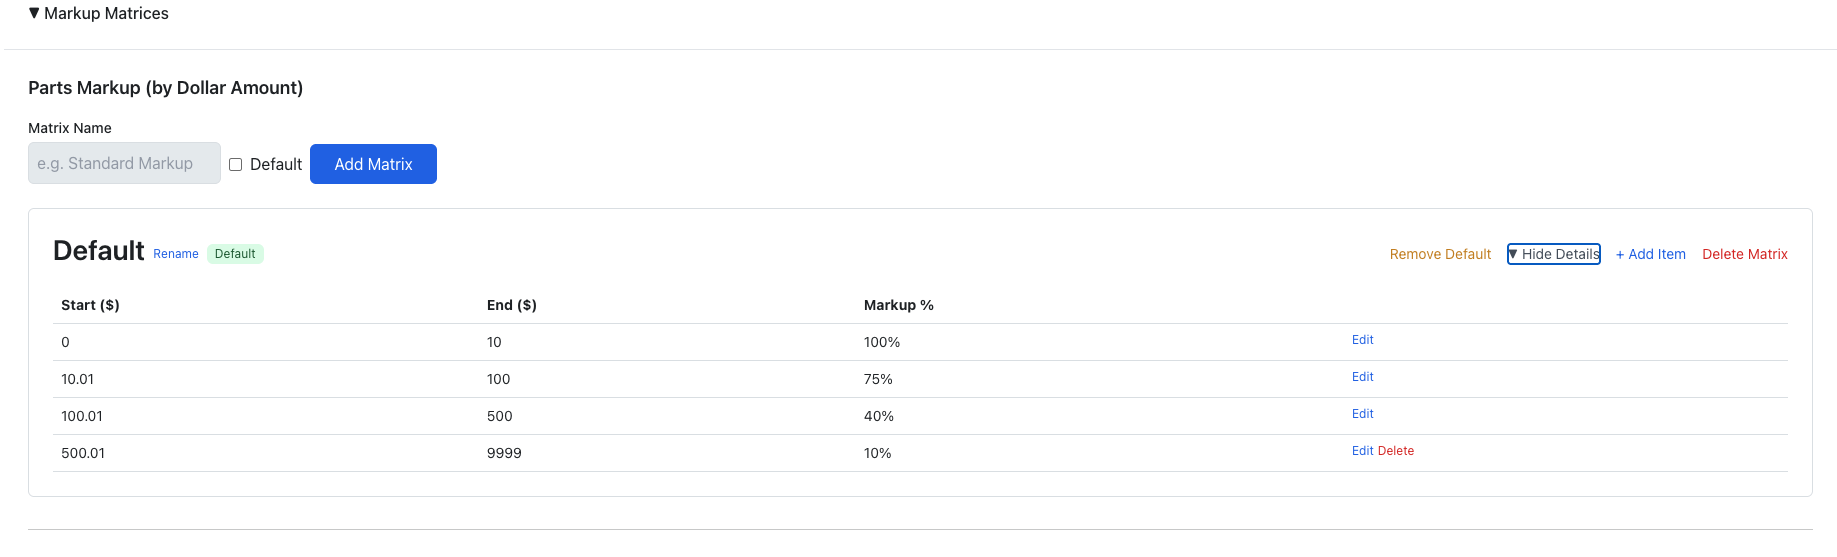
Overview: Markup matrices define price ranges and markup percentages. There are three types: Parts (by dollar amount), Labor (by hours), and Refinish Labor (by hours). You can create multiple matrices and set one as default.
- Expand the Pricing section, then expand Markup Matrices.
- Enter a name and click "Add" to create a new matrix.
- Click "Show Rates" to expand and add price range tiers with markup percentages.
- Set one matrix as "Default" — it will auto-apply to new jobs.
Labor
The Labor section contains two sub-features:
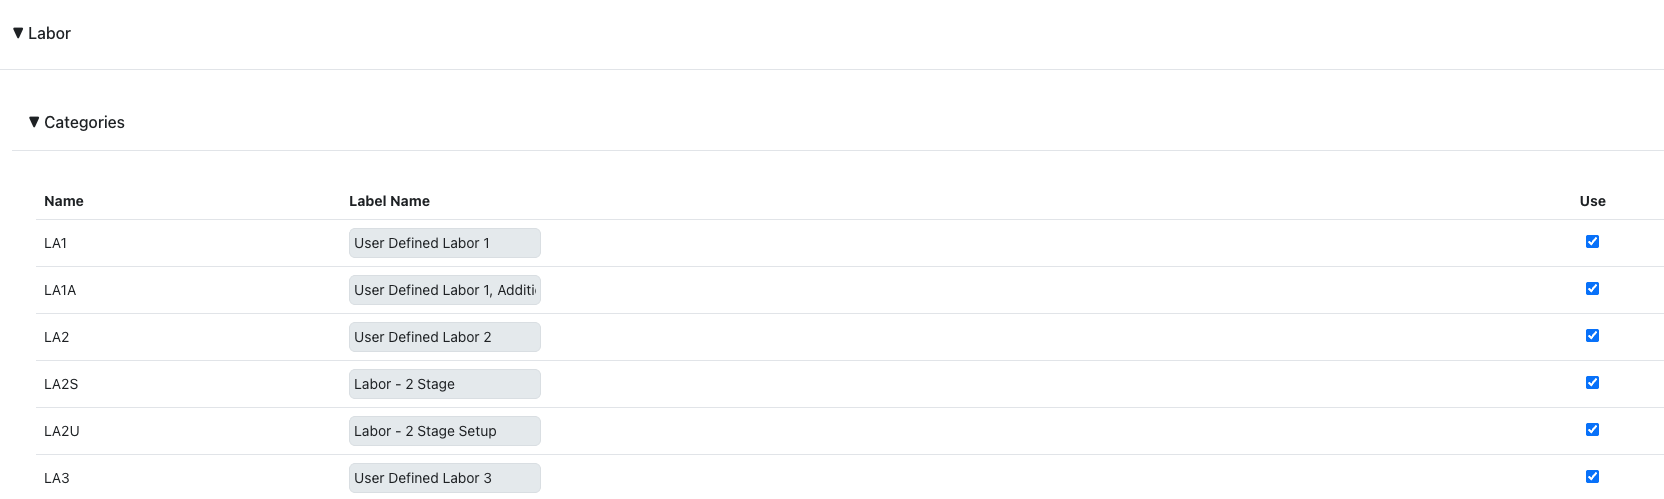
Labor Categories
Customize the label names for labor types (Body, Frame, Mechanical, etc.) and enable/disable which categories your shop uses.
Labor Rate Profiles
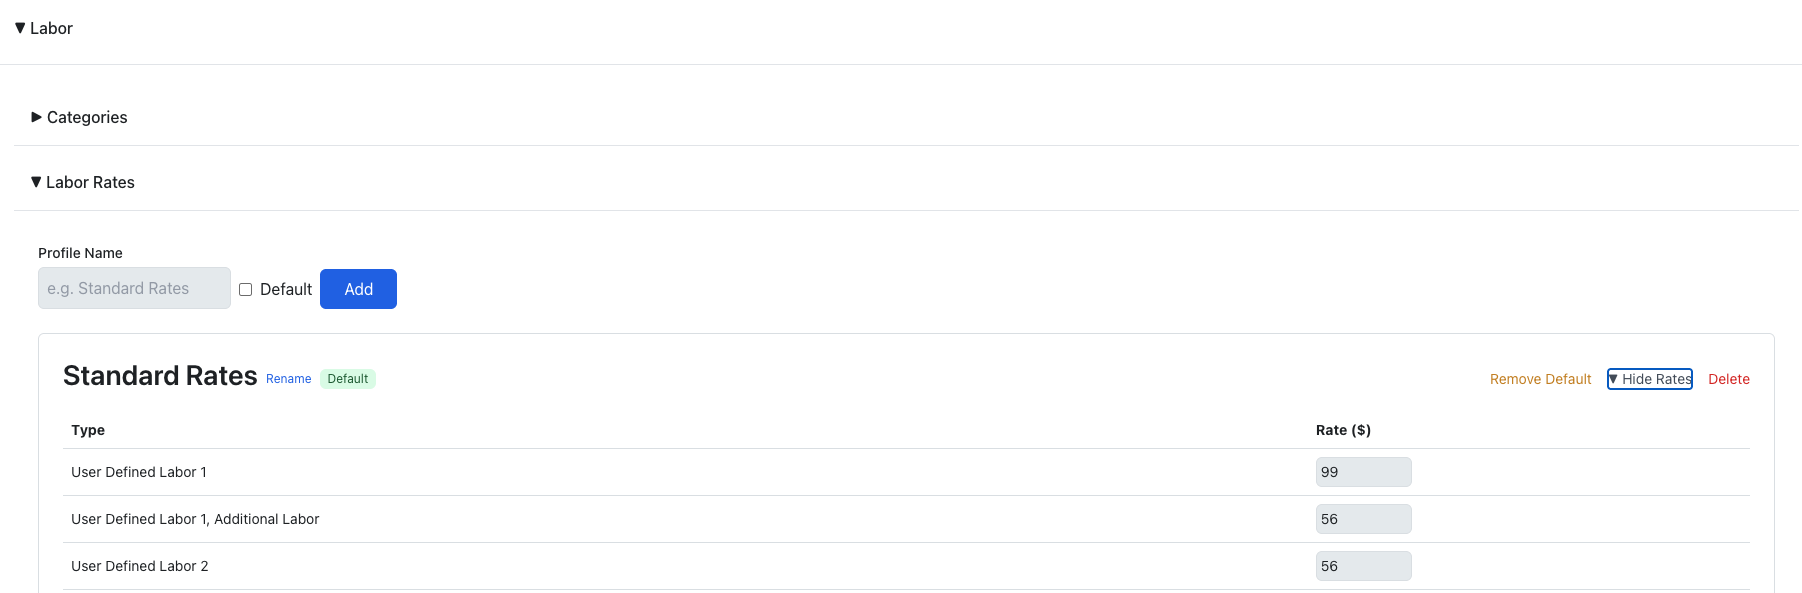
Create named rate profiles with per-type hourly rates. Set one as default to auto-apply to new jobs.
- Enter a profile name and click "Add".
- Click "Show Rates" to set hourly rates for each labor type.
- Set one profile as "Default".
Service Categories
Overview: Service Categories allow admins to organize canned job templates (services) into named groups for easier browsing and filtering.
- Navigate to Company Settings from the side menu → Manage Company.
- Expand the Service Categories section.
- To add a new category, enter a name in the input field and click "Add".
- To edit an existing category, click on its name to edit it inline, then save your changes.
- To delete a category, click the delete control next to the category you want to remove.
Category names must be unique per company (case-insensitive comparison). Names are limited to 100 characters. Deleting a category removes it from all associated service templates without deleting the templates themselves.
Categories created here appear as filter options in the Services panel when adding line items to a job.

Stripe Payments
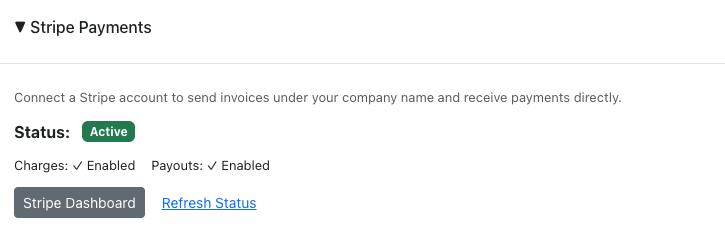
Overview: Connect a Stripe account to send invoices under your company name and receive payments directly. At no point does payment information exist in Repair Bay Evolution.
- Expand the Stripe Payments section.
- Click "Set Up Stripe Account" to create a connected account.
- Complete the Stripe onboarding process (you'll be redirected to Stripe).
- Once onboarding is complete, the status shows "Active" with charges and payouts enabled.
- Use "Stripe Dashboard" to access your Stripe account directly.
Terminal Readers
Once your Stripe account is active, a Terminal Readers sub-section appears here for registering and managing in-person card readers. For hardware, registration, and taking payments, see the Payments guide.
Accounting
The Accounting section groups two sub-sections that control how your financial data maps to your books.
Payment Accounts
Define the payment accounts (such as a credit card or bank account) used to fund purchase orders. These accounts become selectable funding sources when you confirm a PO and drive how those purchases sync to QuickBooks. See Purchase Order Funding Source for how they're used.
QuickBooks
Connect QuickBooks Online and map your accounts, categories, and products so invoices, purchases, and payroll sync correctly. The full walkthrough is in the QuickBooks Integration guide.
Workflow Profiles
Create and manage workflow profiles — the named sets of job statuses your shop moves work through, including status mapping for customer and insurance portals and event triggers. This has a dedicated guide: see Workflow & Status Tracking.
Estimate Disclaimer
Set a customizable disclaimer that's shown to customers before they sign an estimate, and included in estimate emails. Edit it with a rich text editor here in Company Settings. For how it appears to customers, see Estimate Disclaimer in the Estimates guide.
Vendors
Manage the vendors (suppliers) your shop orders parts from, including their credit lines. Vendors you set up here are available when creating purchase orders and ordering parts. See Vendors in the Parts Board guide for details.
Inventory
Company-wide inventory settings, such as stock locations and defaults for fulfilling parts from on-hand inventory. For the full workflow — catalog, stock levels, reservations, replenishment, and QuickBooks sync — see the Inventory guide.
Scheduling & Booking
Overview: Scheduling & Booking groups everything that powers your calendar and online appointment booking into one place. Expand it to find four sub-sections:
- Business Hours — Set open and close times for each day of the week. See Business Hours.
- Appointment Tags — Create reusable, color-coded labels for appointments. See Appointment Tags.
- Online Booking Widget — Generate your public booking link and the website embed snippet customers use to request appointments. See Booking Link & Widget.
- Online Booking Settings — Control booking rules like minimum notice, how far out customers can book, and the time-slot interval shown. See Booking Settings.
The Scheduling & Appointments guide covers the full calendar, appointment types, technician assignment, and the customer booking experience.
Membership
View and manage your subscription. See the Manage Subscription section in the Getting Started guide for details.