QuickBooks Integration
Overview
Repair Bay Evolution integrates with QuickBooks Online (QBO) to keep your accounting in sync without double entry. The integration supports:
- Invoice sync — Invoices created in Repair Bay Evolution are synced to QuickBooks as sales receipts or invoices.
- Purchase sync — Finalized purchase orders are synced to QuickBooks as expenses (credit card payments) or bills (accounts payable).
- Payroll export — Export hourly technician time entries to QuickBooks as expense entries or time activities.
- Account & category mapping — Map your labor categories and line item types to the correct QBO accounts and items.
- Payment account linking — Link your shop's credit cards and bank accounts to QBO accounts for purchase tracking.
- Expense account mapping — Map vendors to QBO expense accounts for accurate categorization of parts purchases.
The integration uses OAuth 2.0 for secure access. At no point are your QBO credentials stored in Repair Bay Evolution.
All QuickBooks settings are located under Settings → Company → Accounting → QuickBooks. Once connected, settings are organized into three collapsible panels: Expenses, Revenue, and Sync History.
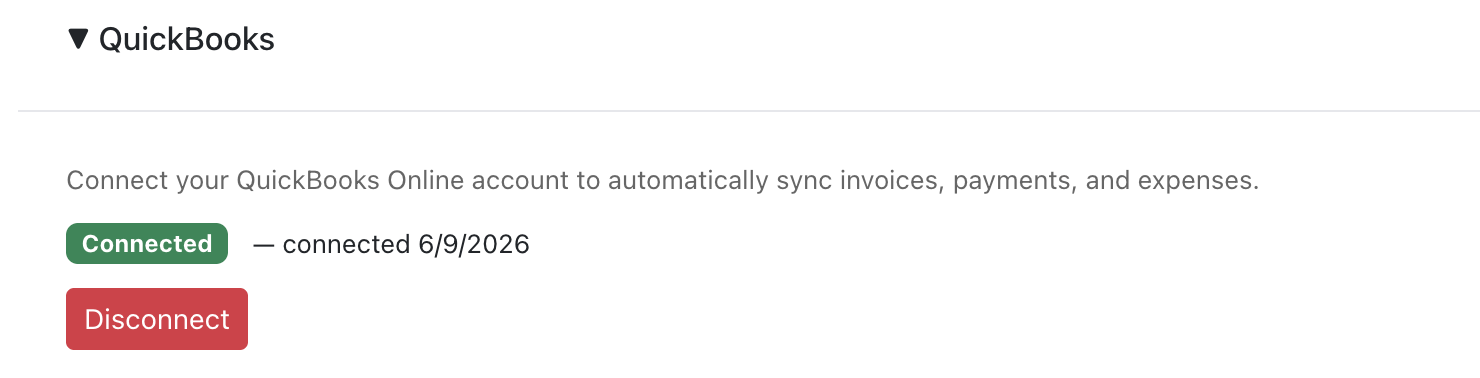
Connect QuickBooks
Settings → Company → Accounting → QuickBooks
- Go to Company Settings → Accounting → QuickBooks.
- Click "Connect to QuickBooks".
- You'll be redirected to Intuit's authorization page.
- Sign in to your QuickBooks account and grant access.
- After authorization, you're redirected back to Repair Bay Evolution with a "Connected" status.
Once connected, the status shows your QBO company name and the date you connected. The three configuration panels (Expenses, Revenue, Sync History) become available below.
Expenses
Settings → Company → Accounting → QuickBooks → Expenses
The Expenses panel contains settings for how money going out is tracked in QuickBooks. It has three areas: Default Accounts at the top, then collapsible sub-sections for Payroll and Purchases.
Default Accounts
Expenses → Default Accounts
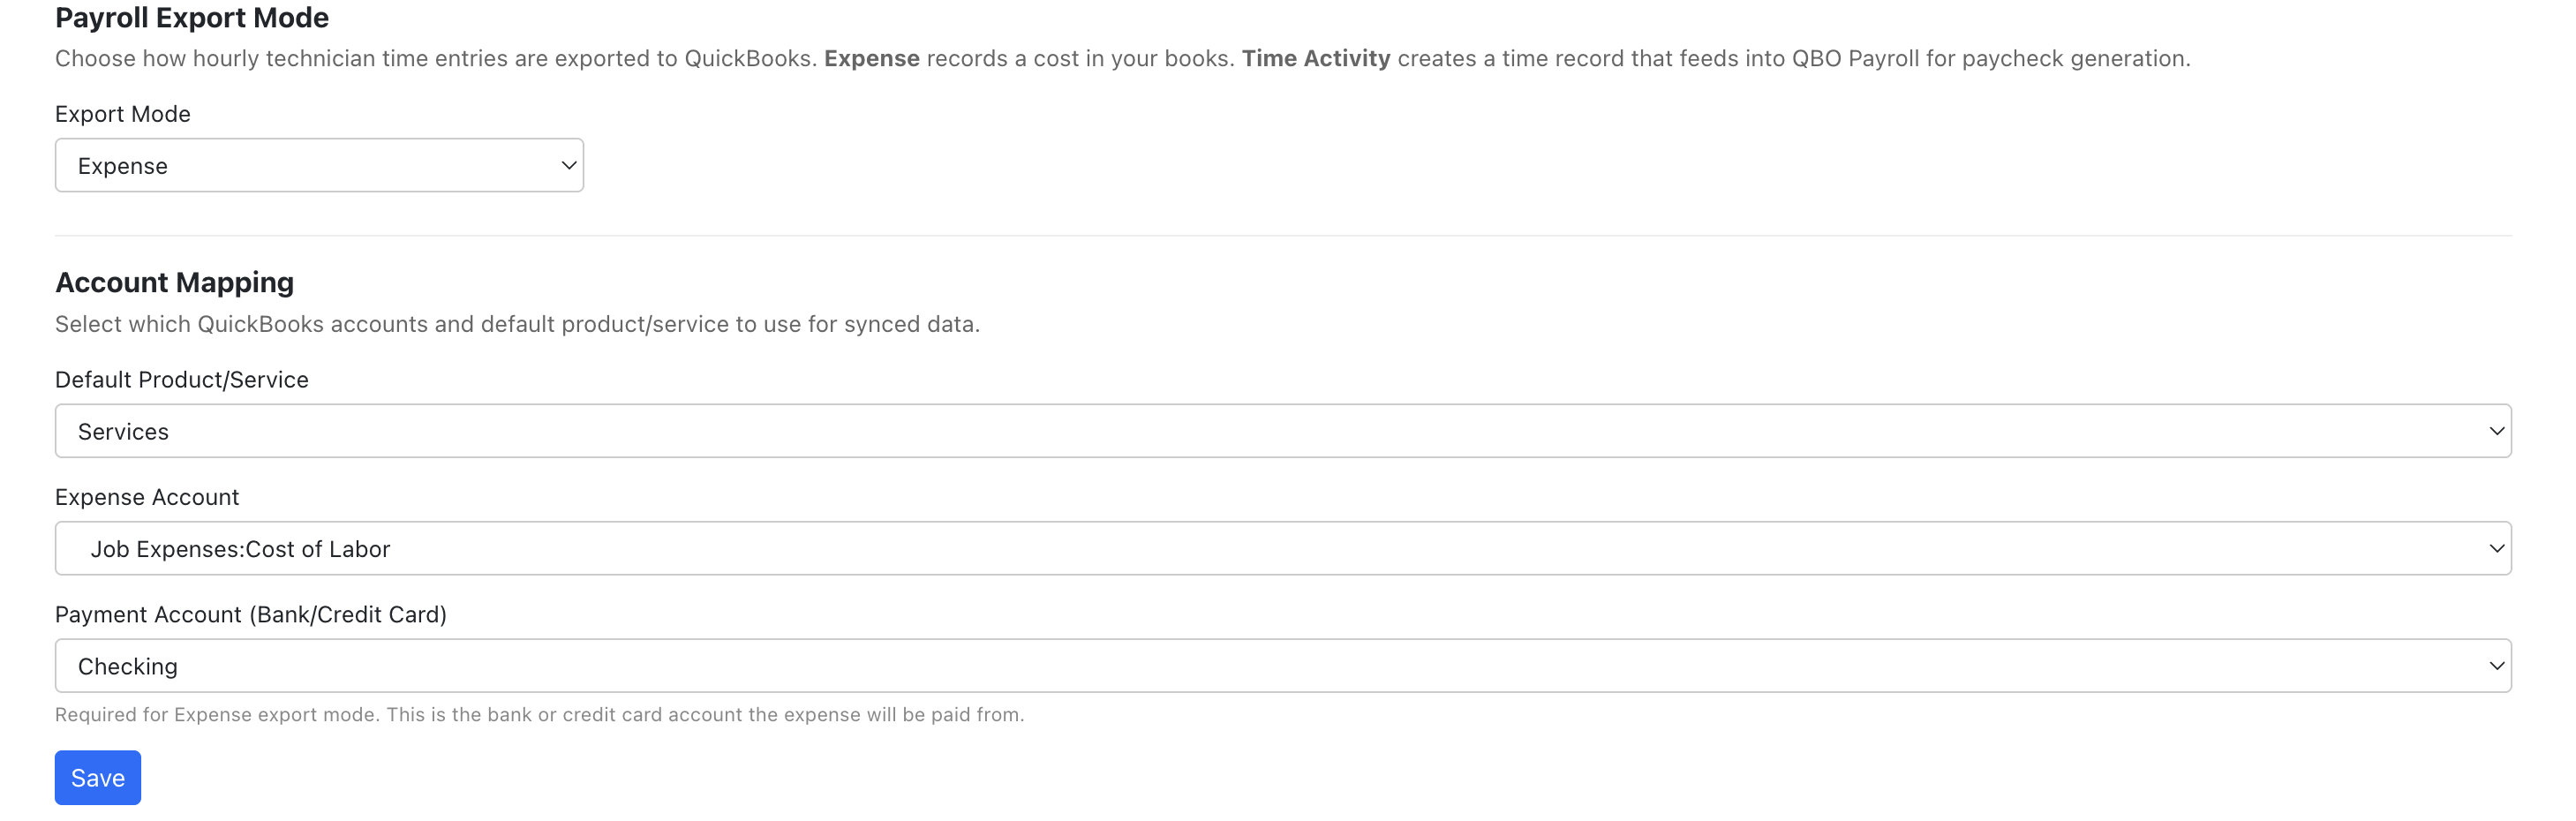
These are global fallback accounts used by both purchase sync and payroll expenses when no more specific mapping is configured.
- Expense Account — The QBO expense account used as a fallback for purchase sync and payroll when no vendor-specific or default vendor mapping exists.
- Payment Account (Bank/Credit Card) — The QBO bank or credit card account used as the payment source for expense transactions and purchase sync.
Account options are pulled live from your QBO chart of accounts. If you add new accounts in QuickBooks, they'll appear here on your next visit.
Payroll
Expenses → Payroll
The Payroll sub-section controls how hourly technician time entries are exported to QuickBooks.
Export Mode
Choose how payroll data is sent to QuickBooks. The export mode determines what type of QBO entity is created for each technician.
Expense Mode (Default)
Creates an expense entry in QBO for each technician. Each expense records the total hours, rate, and cost as a line item on the mapped expense account.
- Best for shops that track tech pay as a direct expense category.
- Uses the Expense Account and Payment Account configured in Default Accounts above.
- Shows up in QBO under Expenses, making it easy to see total payroll spend.
Time Activity Mode
Creates a time activity entry in QBO for each technician. Time activities record hours worked and can feed into QBO's built-in payroll.
- Best for shops that use QBO Payroll or want time data to feed into paycheck calculations.
- Technicians are matched to a QBO Employee or Vendor via technician mapping (below).
- Hours and minutes are calculated from total hours (e.g., 6.5 hours becomes 6 hours, 30 minutes).
You can switch modes at any time. Previously exported records are not affected. The current export mode is displayed on the Hourly Payroll section of the Payroll page so you can confirm before exporting.
Technician QBO Mapping
Below the export mode selector, each technician can be mapped to a QBO entity:
- Employee — Use for W-2 employees. Time activity exports feed directly into QBO Payroll.
- Vendor — Use for 1099 contractors. Time activities show as contractor time. In Expense mode, vendor-mapped technicians have vendor attribution on the expense.
A technician without a mapping will fail to export in Time Activity mode. In Expense mode, mapping is optional but recommended for vendor attribution.

Purchases
Expenses → Purchases
The Purchases sub-section manages how purchase orders sync to QuickBooks. It contains several panels:
Configuration Summary
At the top, a summary shows how many of your vendors and payment accounts are fully configured for QBO sync, highlighting what still needs attention.
Payment Account Linking
Links your shop's physical payment methods (credit cards, bank accounts) to the corresponding QBO bank/credit card accounts. This tells purchase sync which QBO account to record expenses against.
- You'll see a list of your active payment accounts with name, type, and last four digits.
- Click "Link" next to a payment account.
- Select the corresponding QBO Bank or Credit Card account from the dropdown.
- Confirm the link.
Unlinking does not affect previously synced transactions. Future purchase orders using that account will fail to sync until re-linked.
Expense Account Mapping
Determines which QBO expense account categorizes purchase line items when syncing. Resolution order:
- Vendor-specific mapping — If the vendor has an assigned QBO expense account, it's used.
- Default mapping — If no vendor-specific mapping, the company's default expense account is used.
- Global fallback — The Expense Account configured in Default Accounts above.
Add vendor-specific mappings by clicking "Add Mapping", selecting a vendor, and choosing the QBO expense account.
Inventory Accounts
Configure QBO asset and COGS accounts for inventory sync. These control where inventory value and cost-of-goods-sold are recorded when stock transactions sync to QuickBooks.
Purchase Sync History
Shows recent purchase order sync operations with status (success, failed, pending) and allows retrying failed syncs.
Revenue
Settings → Company → Accounting → QuickBooks → Revenue
The Revenue panel controls how invoice income is classified in QuickBooks. It covers the default product/service, flat price sync mode, and category-to-QBO-item mappings.
Default Product/Service
Revenue (top)
The fallback QBO product/service used for invoice line items that don't have a specific category mapping. When an invoice syncs and a line item's category isn't mapped below, it posts to this item.
- Open the Revenue panel.
- Select a QBO product/service from the "Default Product/Service" dropdown.
- Click Save.
Product/service options are pulled live from QBO and grouped by parent item for easy navigation.
Flat Price Sync Mode
Revenue → Flat Price Sync Mode
When a flat price service is included on an invoice that syncs to QuickBooks, this setting controls how it appears on the QBO side:
Lump Sum (Default)
Each flat price service is sent as a single line item. It posts to the QBO product/service mapped to the service's accounting category (or the default product/service if unmapped).
- Keeps the QBO invoice clean with one line per service.
- Best when you don't need individual parts/labor detail in QuickBooks.
- Revenue lands on the account tied to that QBO product/service.
Itemized
Each flat price service is split into its underlying parts and labor lines in QuickBooks. The flat price total is proportionally allocated across the individual items.
- Gives granular detail in QuickBooks (useful for cost-of-goods tracking or detailed P&L breakdowns).
- Each line uses standard category mapping (same as non-flat-price items).
Previously synced invoices are not affected — only future syncs use the new mode.
Service Category Mapping (Lump Sum Mode)
When lump sum mode is selected, a mapping panel appears below. Map each of your service categories to a specific QBO product/service:
- For each service category, select a QBO product/service from the dropdown.
- Categories left as "Use Default" will post to the Default Product/Service above.
- Click Save.
To assign an accounting category to a flat price service template, edit the template and set its "Accounting Category" in the pricing section. See the Flat Price guide for details.

Category Item Mapping
Revenue → Category Item Mapping
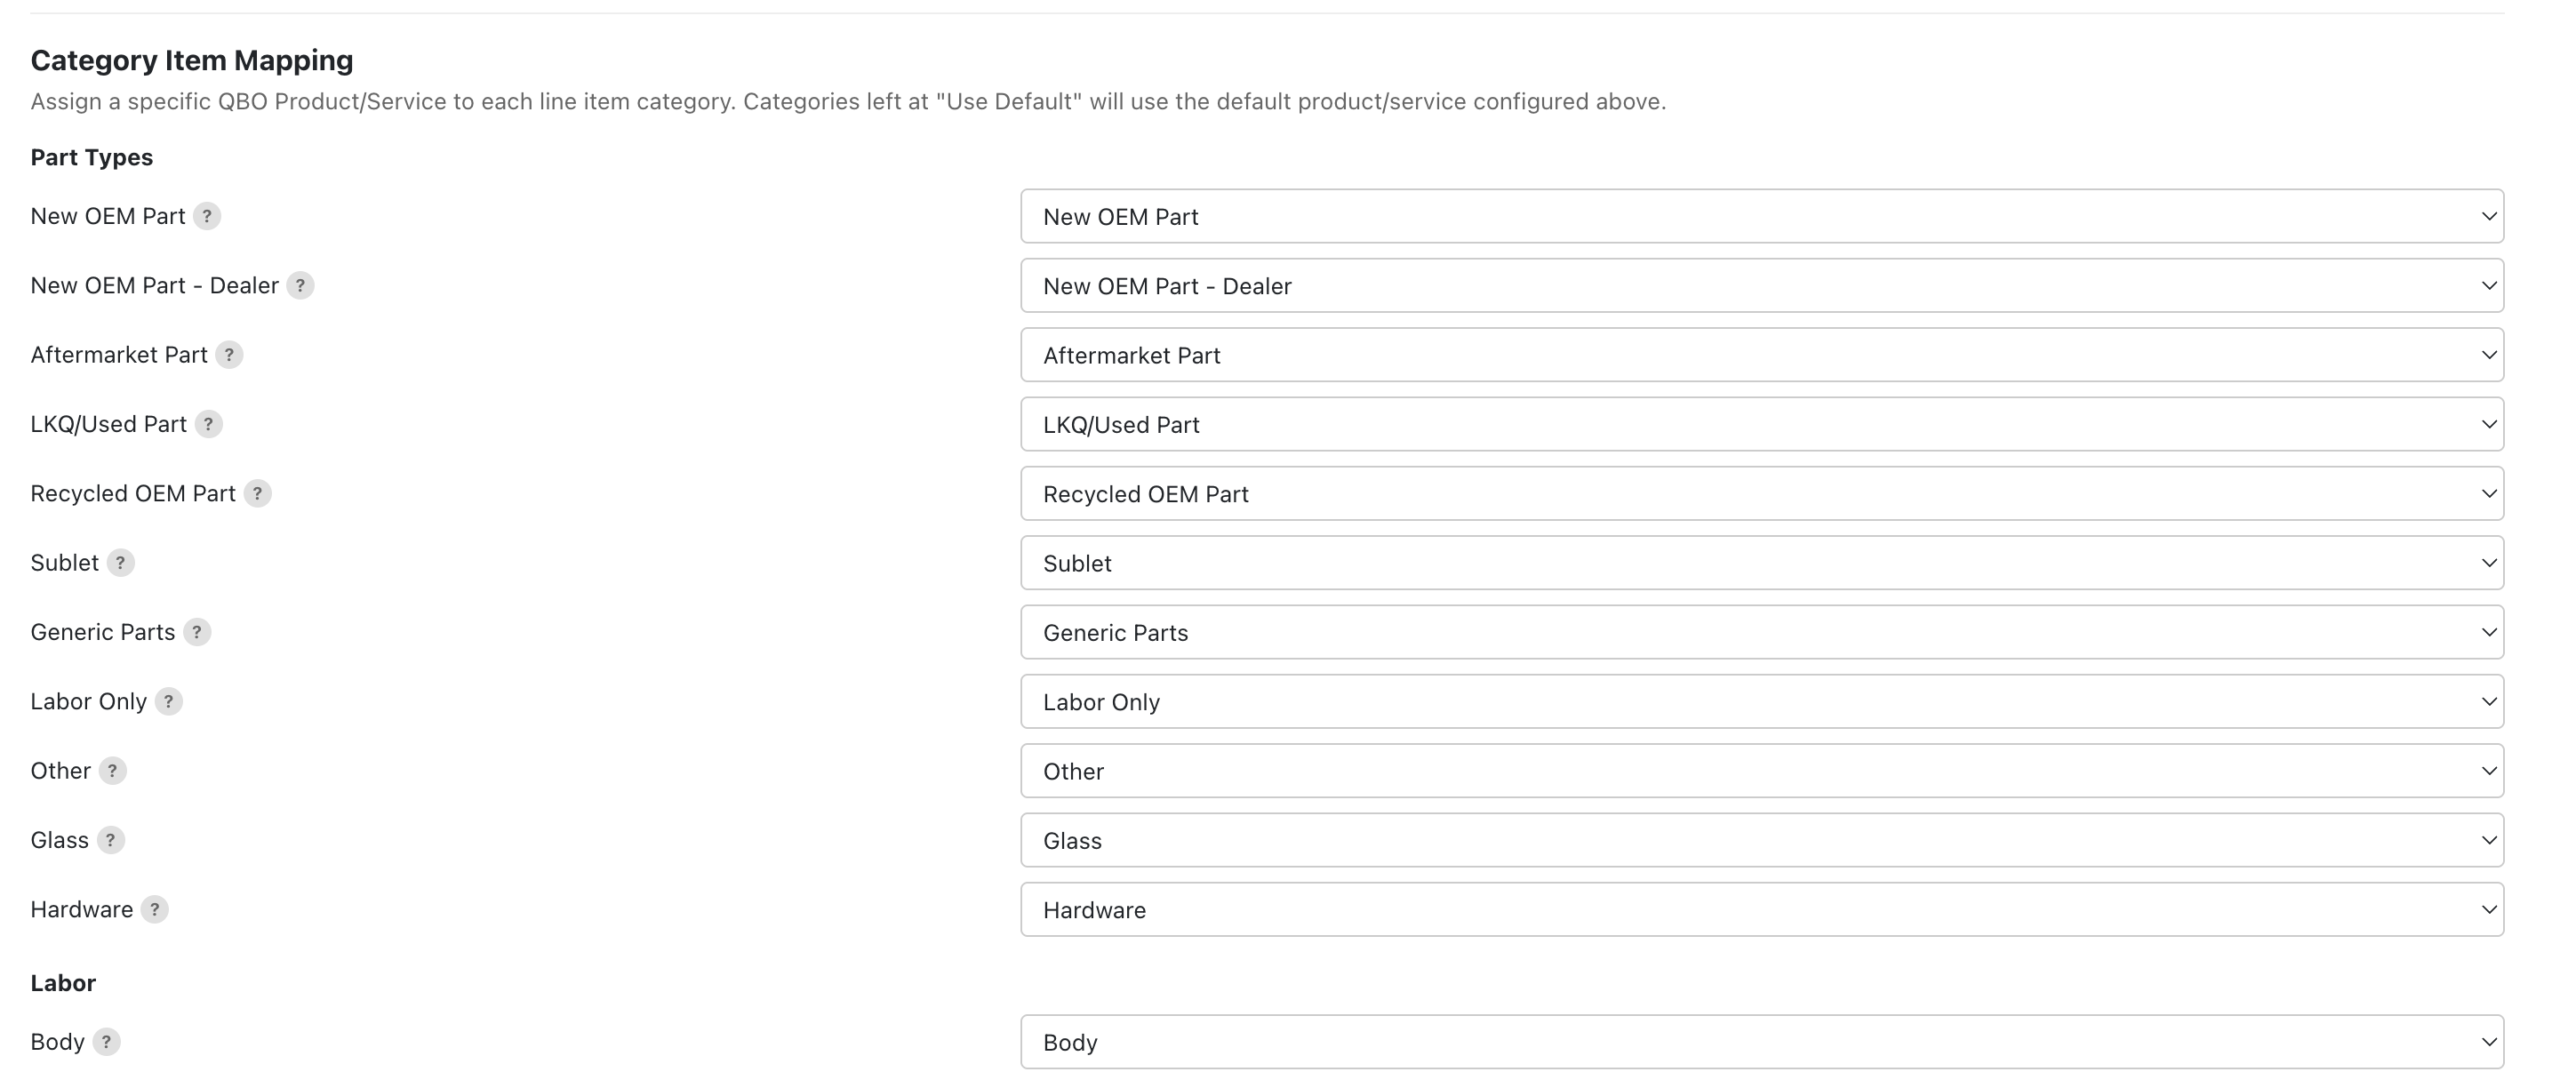
Assign a specific QBO product/service to each line item category. This controls where revenue lands in your chart of accounts when invoices sync.
Categories are organized by group (Parts, Labor, Refinish, Other). For each category:
- Select the corresponding QBO product/service from the dropdown.
- Leave as "Use Default" to use the Default Product/Service configured above.
- Click Save.
When an invoice syncs, each line item is routed to the QBO product/service mapped to its category. Unmapped categories use the default.
Invoice Sync
Automatic (triggered when invoice is finalized)
When you create and finalize an invoice in Repair Bay Evolution, it is automatically synced to QuickBooks.
- Line items are mapped to QBO products/services using your category mapping (or the default).
- Tax amounts are included as configured.
- Flat price services follow the flat price sync mode (lump sum or itemized).
- The sync status is tracked per invoice in the Sync History panel.
If a sync fails (e.g., QBO is temporarily unavailable), the system retries automatically. You can also manually retry from the sync history.
Purchase Sync
Automatic (triggered when a purchase order is finalized)
When a purchase order is finalized, Repair Bay Evolution automatically syncs it to QuickBooks based on how the purchase was funded:
- Credit card / bank account payment — Creates a QBO Purchase (expense) against the linked QBO bank/credit card account.
- Accounts payable (vendor credit line) — Creates a QBO Bill representing what you owe the vendor.
- Manual funding — Not synced automatically. Use the "Sync to QBO" button on the purchase order to choose Purchase or Bill.
How It Works
- A purchase order is finalized on the Parts Board.
- The system determines the funding type.
- For payment account or AP funding, a sync is queued automatically.
- The sync resolves the QBO bank account (from payment account linking), expense account (from expense mapping), and vendor reference.
- Line items are sent to QBO with quantities and unit costs.
Updates and Voids
- If a PO's cost changes after syncing, you can trigger an update to revise the QBO transaction.
- If a PO is voided, the corresponding QBO Purchase is voided or Bill is deleted.
Prerequisites
- QBO must be connected.
- The vendor must be linked to a QBO Vendor (in Vendor settings).
- For Purchase syncs: payment account must be linked to a QBO account (see Purchases).
- An expense account must be mapped for the vendor or a default must be set (see Expense Account Mapping).
Payroll Export
Payroll page → Hourly section
The payroll export sends hourly technician time entries to QuickBooks. This is initiated from the Payroll page.
- On the Payroll page, review the entries for the pay period.
- Click "Export to QuickBooks".
- Set the transaction date for the QBO entries.
- Confirm the export.
The export processes each technician individually. If one fails (e.g., missing mapping), the others still succeed — partial-failure model so one error doesn't block the whole batch.
After export, items are marked as exported and an export history record is created.

Export History
Payroll page → Export History panel
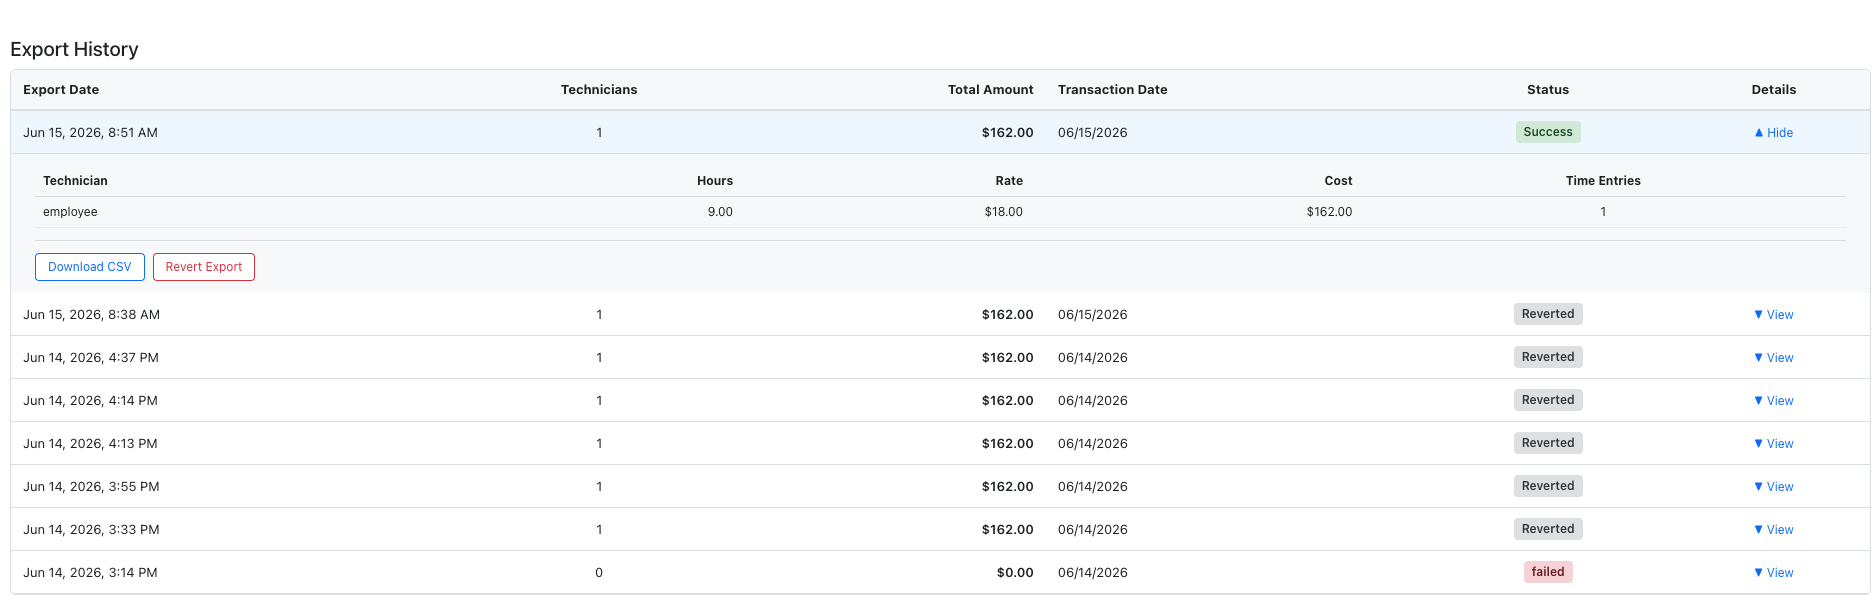
Every payroll export is recorded with full details:
- Export date and who triggered it
- Transaction date used in QBO
- Status (success, partial success, or failed)
- Total amount and technician count
- Per-technician breakdown with hours, rate, and cost
- Failed items with error reasons (for partial failures)
Access export history from the Payroll page under the "Export History" panel. Download any export as a CSV file.
Revert an Export
Payroll page → Export History panel
If you need to undo a payroll export (e.g., exported the wrong date range):
- Go to the Export History panel on the Payroll page.
- Find the export record you want to revert.
- Click "Revert".
- The export status changes to "Reverted" and the associated items become available for re-export.
Note: Reverting in Repair Bay Evolution does not delete the entries from QuickBooks. You'll need to manually remove those entries in QBO if needed.
Sync History
Settings → Company → Accounting → QuickBooks → Sync History
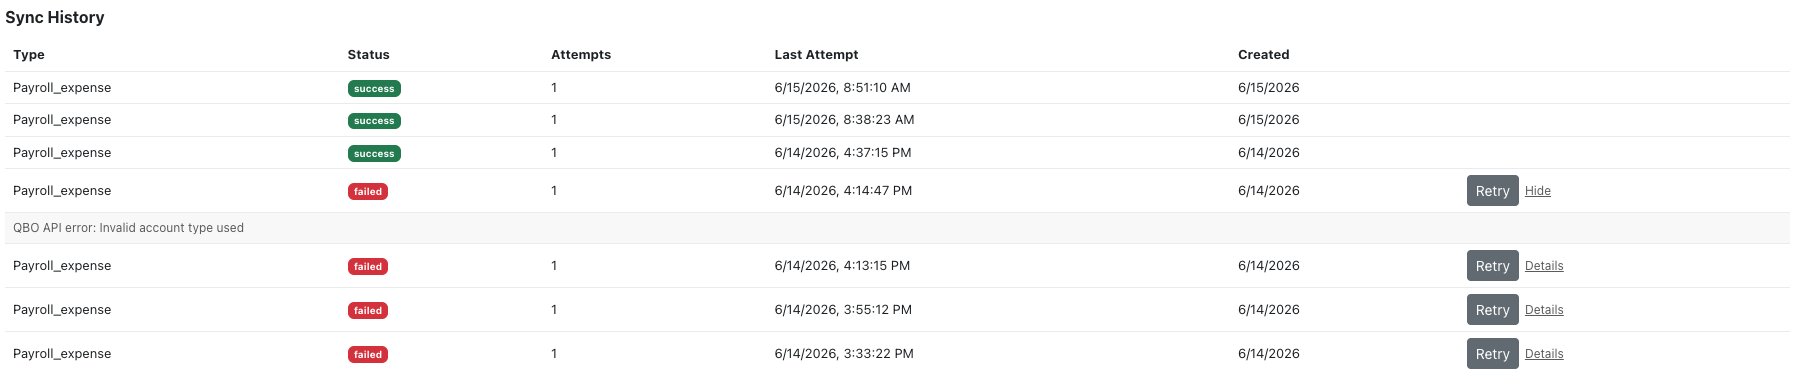
The Sync History panel shows all QBO sync operations (invoices, purchases, etc.) with their status:
- Success — Successfully created/updated in QBO.
- Failed — An error occurred. Click "Details" to see the error, then "Retry" to try again.
- Pending — Queued for sync.
Each record shows the entity type, status, attempt count, and last attempt time. Failed records can be expanded to see error details.
Disconnect
Settings → Company → Accounting → QuickBooks
If you need to disconnect your QuickBooks account:
- Go to Company Settings → Accounting → QuickBooks.
- Click "Disconnect".
- Confirm the disconnection.
Disconnecting stops all future syncs. Previously synced data in QuickBooks is not affected. You can reconnect at any time.