Parts Board & Statuses
Overview
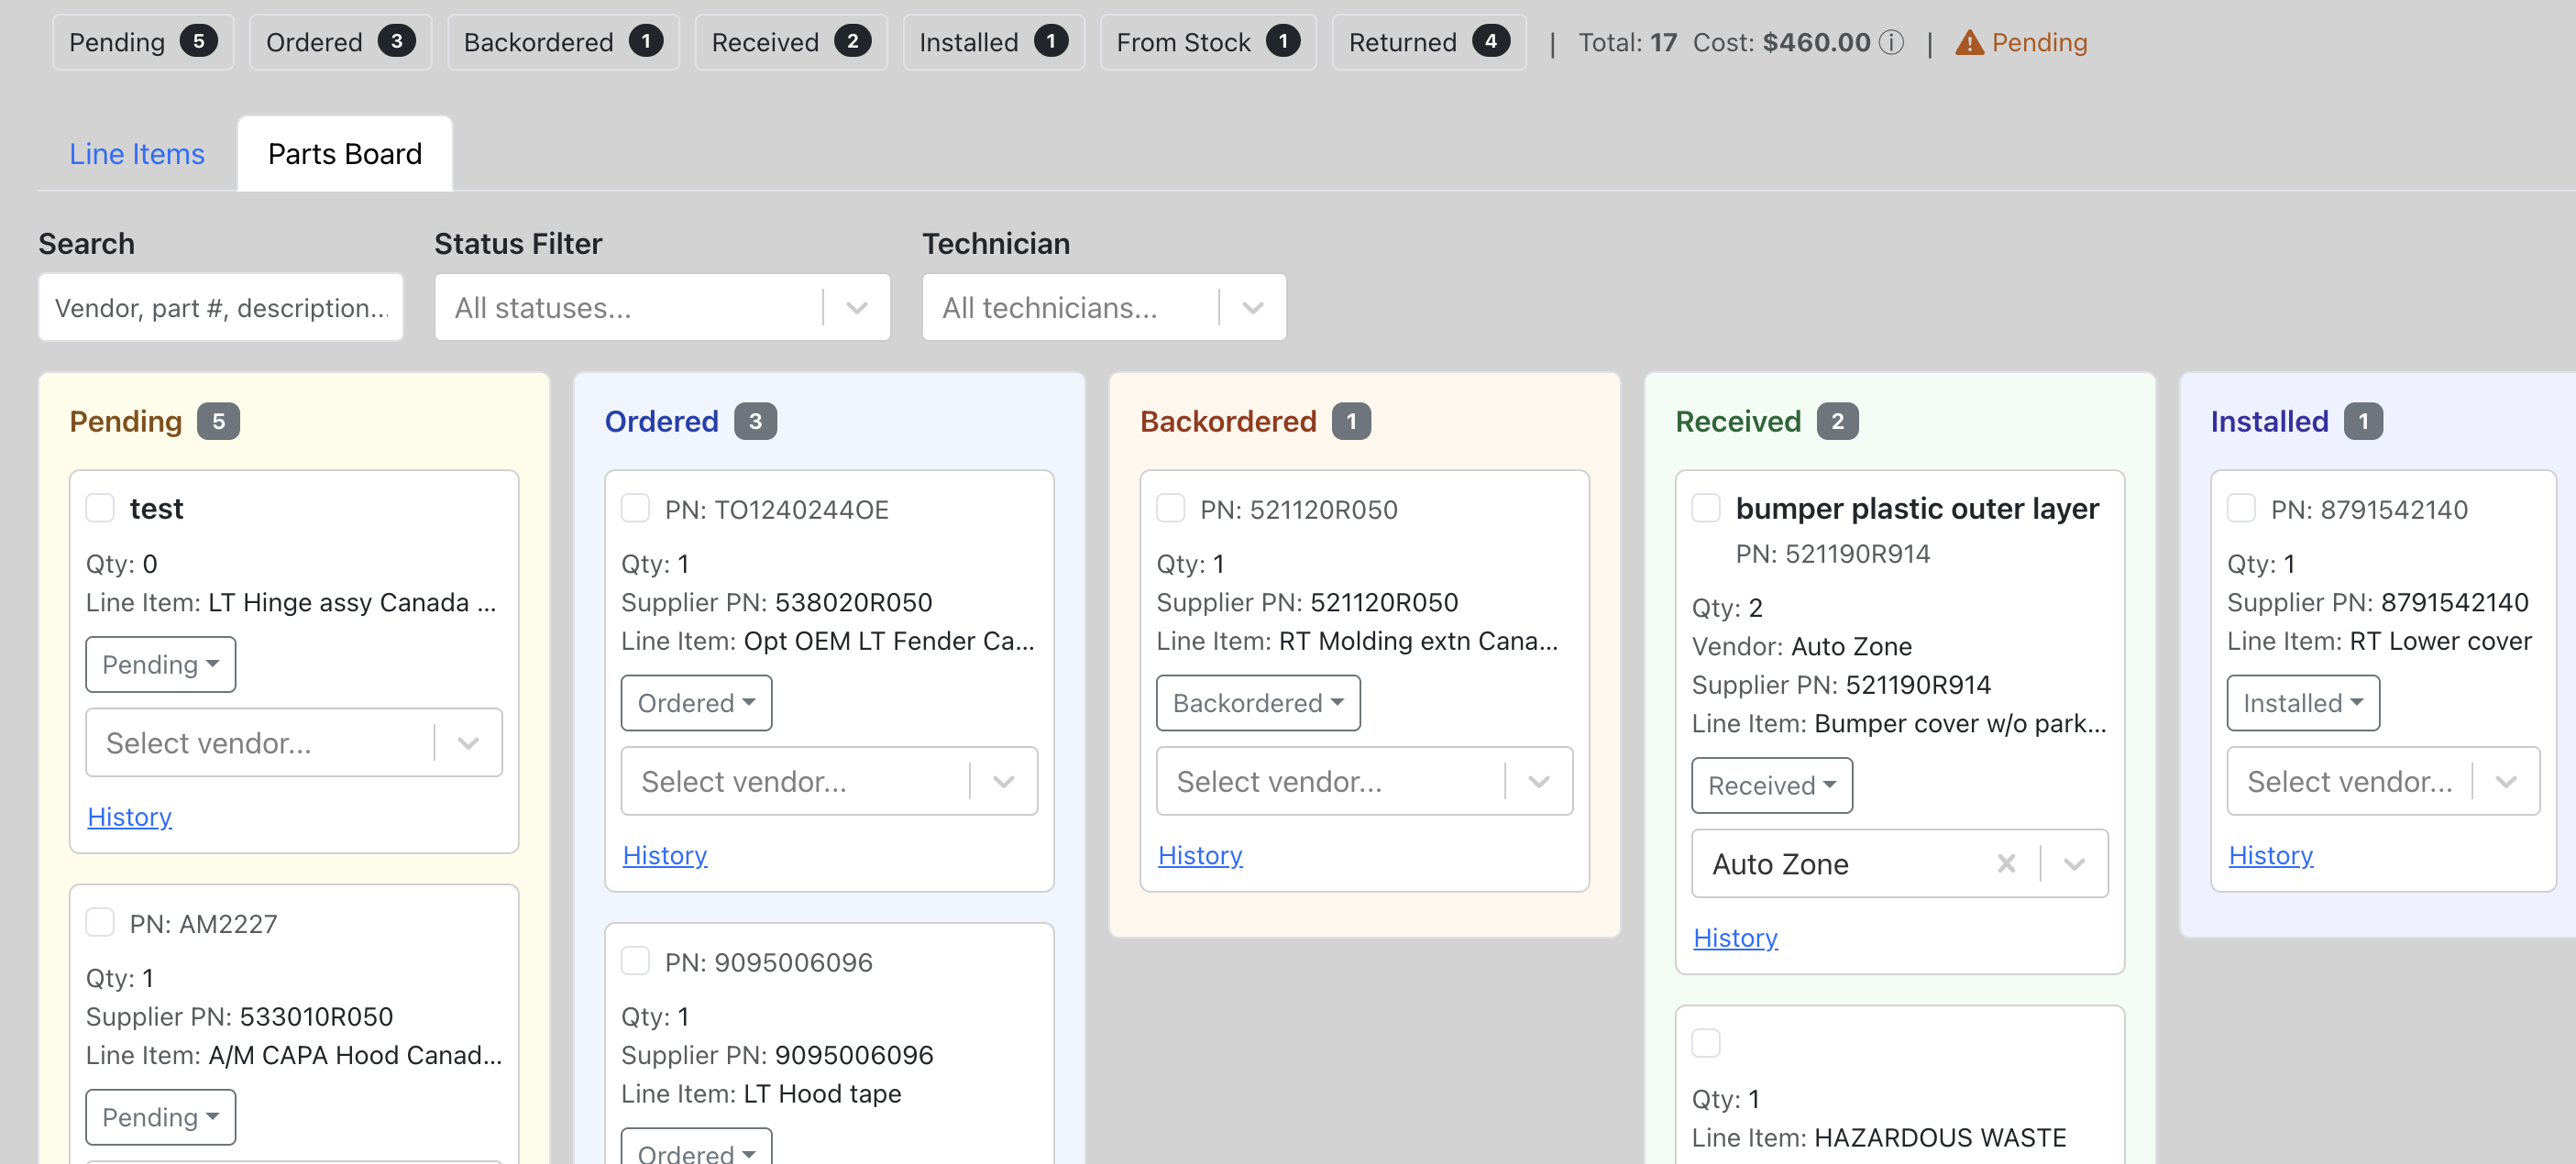
The Parts Board gives you a Kanban-style view of every part on a repair order, grouped by its current status. It lets you track parts through the full procurement lifecycle — from pending through ordering, receiving, installing, and handling returns. You can update statuses individually or in bulk, filter by status or assigned tech, and see a summary of counts and costs at a glance.
Part Statuses
Every part on a job has a status that reflects where it is in the procurement workflow:
| Status | Meaning |
|---|---|
| Pending | Part has been added to the job but not yet ordered. |
| Ordered | Part has been ordered from a vendor. |
| Backordered | Part is on backorder from the vendor. |
| Received | Part has arrived and is on hand. |
| Installed | Part has been installed on the vehicle. |
| From Stock | Part was fulfilled from existing inventory rather than ordered. |
| Returned | Part has been returned to the vendor. |
Status Transitions
Parts follow a controlled workflow. You can only move a part to certain statuses depending on its current status:
| Current Status | Can Move To |
|---|---|
| Pending | Ordered, Backordered, Fulfilled from Stock |
| Ordered | Received, Backordered, Returned |
| Backordered | Ordered, Received |
| Received | Installed, Returned |
| Installed | Returned |
| Fulfilled from Stock | Installed, Returned |
| Returned | (terminal — no further transitions) |
The system enforces these transitions automatically — the status selector will only show valid options.
Parts Board View
Access the parts board from within any job:
- Open a job.
- Click the "Parts Board" tab.
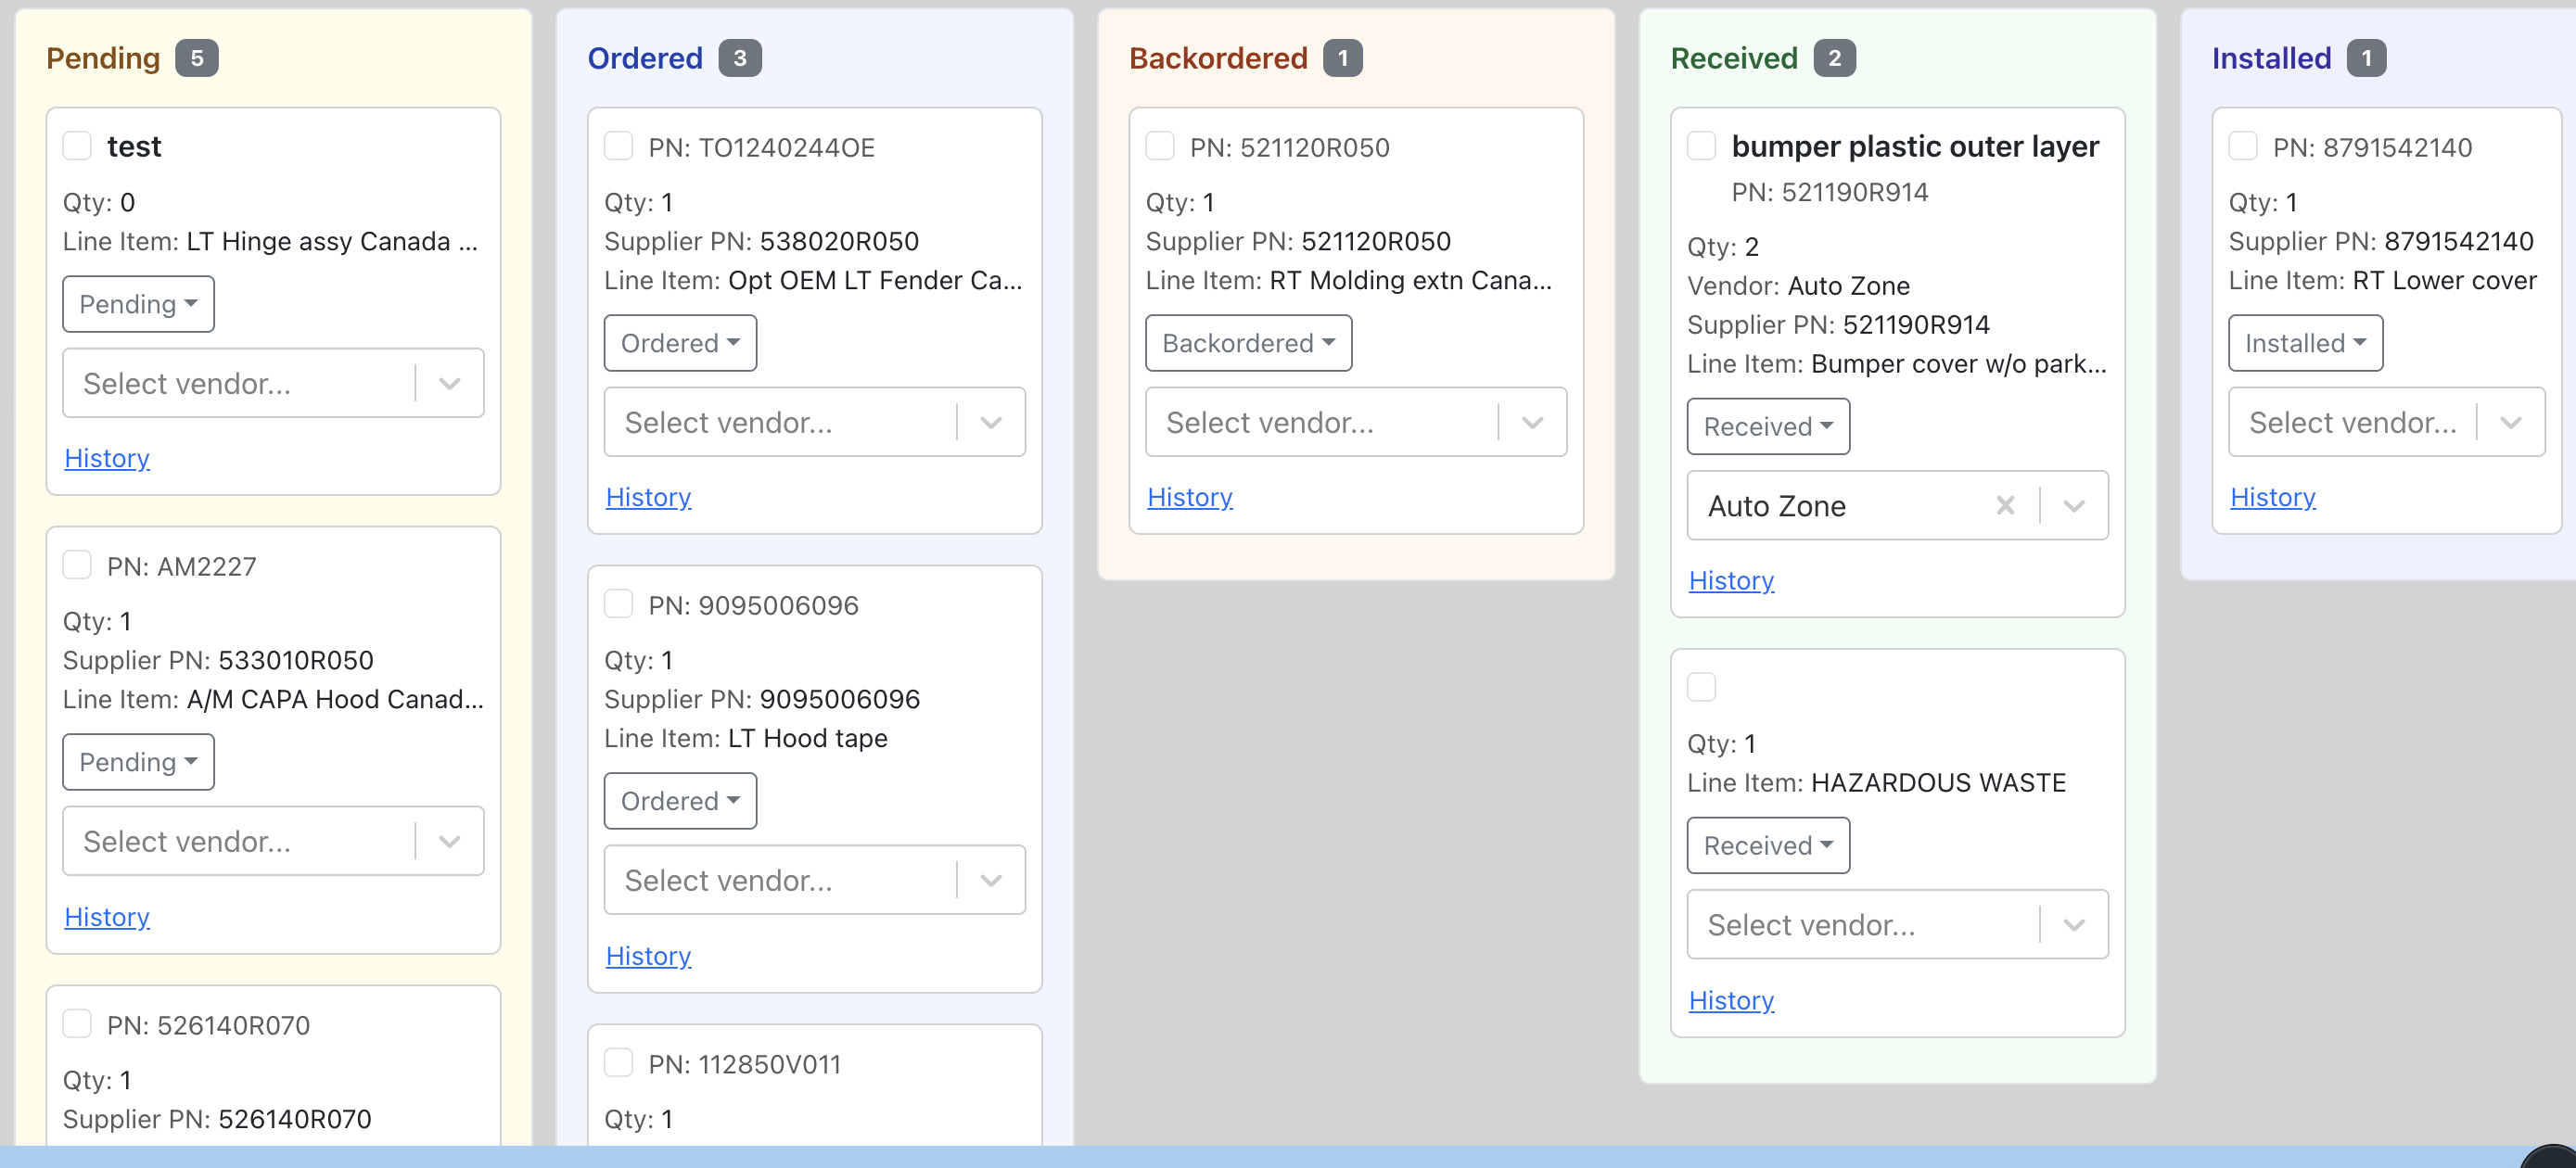
- Parts are displayed in columns grouped by status, Kanban-style.
- Each card shows the part number, description, quantity, vendor, and assigned tech.
Update Part Status
To change the status of a single part:
- Find the part on the board or in the line items view.
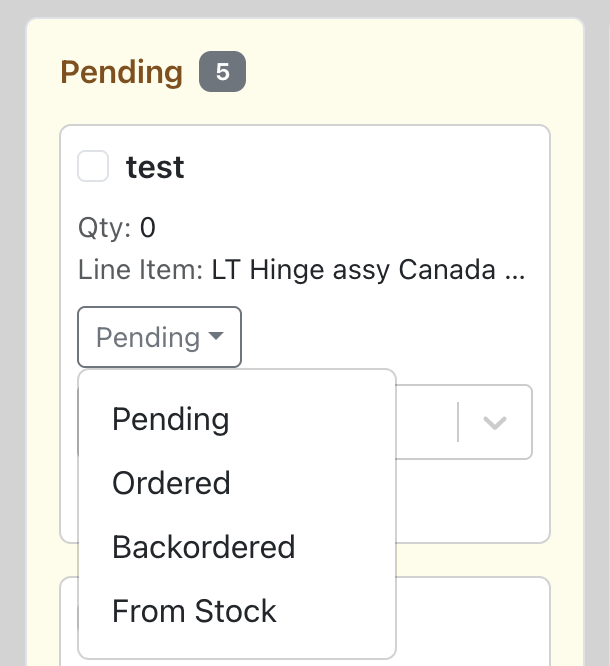
- Click the status dropdown on the part card.
- Select the new status from the allowed transitions.
- If you select "Ordered" and draft purchase orders already exist for that vendor, a dialog appears letting you choose which PO to place the part on — or create a new one. See the Purchase Orders guide for details.
- The part moves to its new column immediately.
Bulk Status Update
Need to move multiple parts at once (e.g. mark several parts as Received when a shipment arrives)?
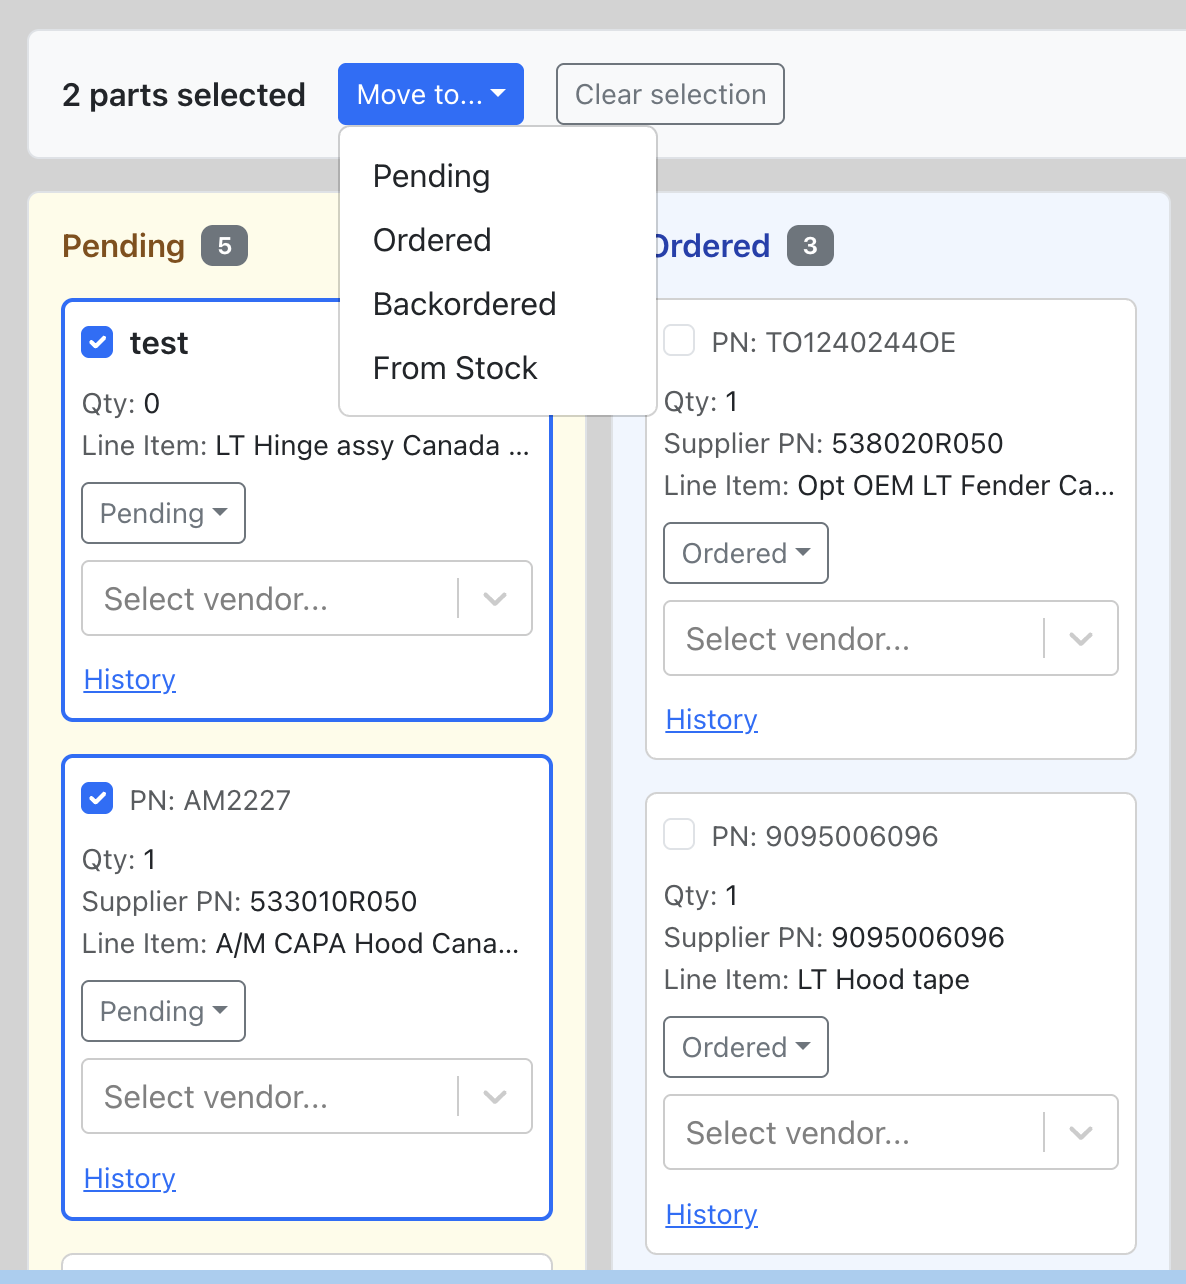
- Select multiple parts using the checkboxes on each card.
- A bulk action bar appears showing how many parts are selected.
- Choose the target status — only statuses that are valid for all selected parts will be available.
- Click "Update Status" to move them all at once.
You can select up to 50 parts in a single bulk operation.
Filter & Assign
Use the filter controls at the top of the parts board to narrow down what you see:
- Filter by Status — Show only parts in specific statuses (e.g. only Ordered and Backordered).
- Filter by Assigned Tech — Show only parts assigned to a specific technician.
You can also assign a vendor to parts directly from the board, helping you track which vendor each part is sourced from.
Parts Summary
The parts summary panel shows at-a-glance metrics for the job:
- Status Counts — How many parts are in each status.
- Total Count — Total number of parts on the job.
- Total Cost — Combined cost of all parts.
- All Parts Fulfilled — A quick indicator showing whether every part has reached Installed or Fulfilled from Stock status.

Return a Part
When a part needs to be sent back to the vendor:
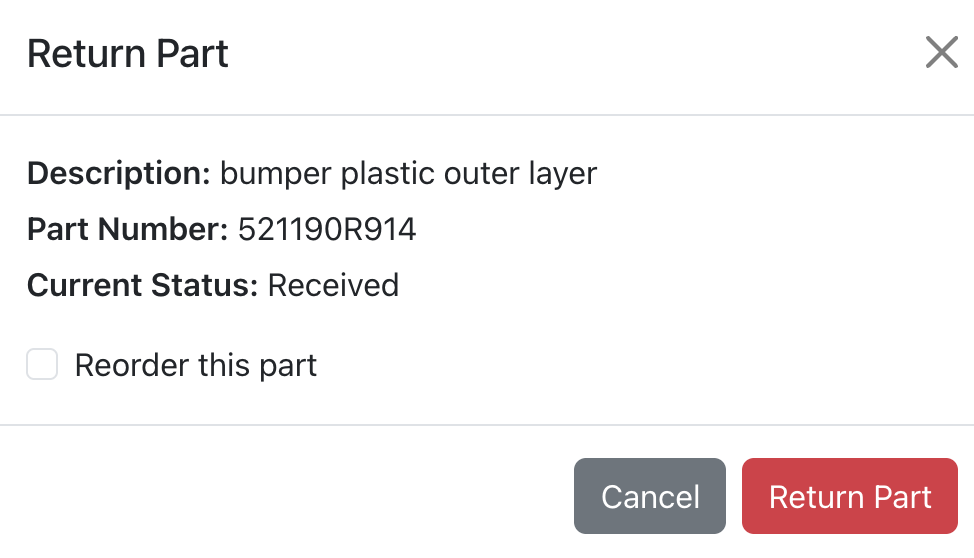
- Move the part to "Returned" status using the status dropdown.
- A dialog appears asking if you'd like to reorder a replacement part.
- If you choose to reorder, a new part is automatically created in Pending status with the same details (part number, description, etc.).
- The original part remains in Returned status as a record.
Credit Lines on Invoices
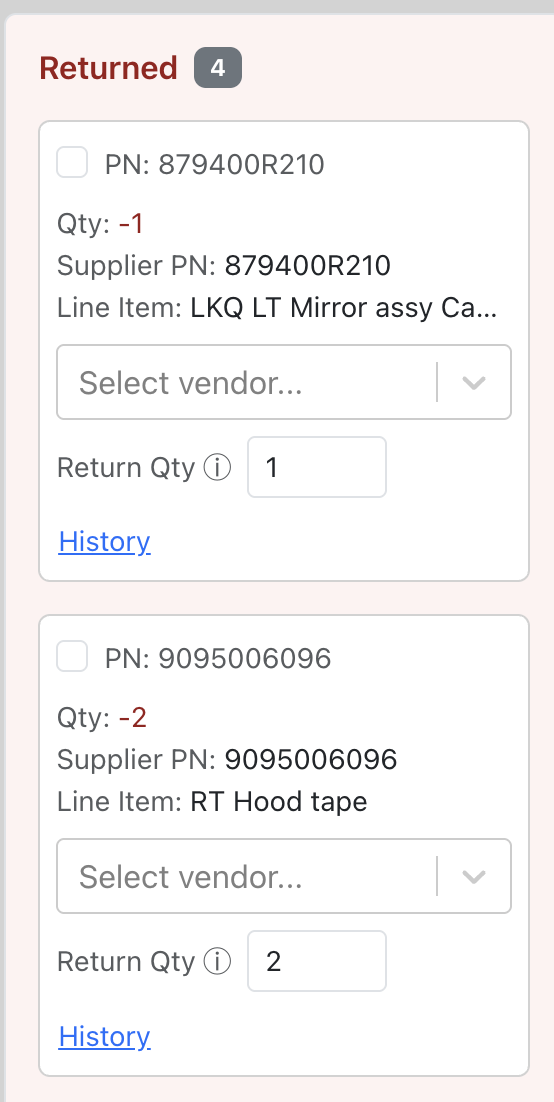
When a part is returned, you can set a negative quantity on it to create a credit line on invoices. This automatically reduces the invoice total by the value of the returned part.
- A part must be in "Returned" status.
- Set the return quantity (a negative number representing the credit amount).
- When an invoice is generated, the returned part appears as a negative line item — effectively crediting the customer.
This is useful when a customer has already been invoiced for a part that was later returned. Instead of voiding and re-creating the entire invoice, the credit line adjusts the balance on the next invoice.
Status History
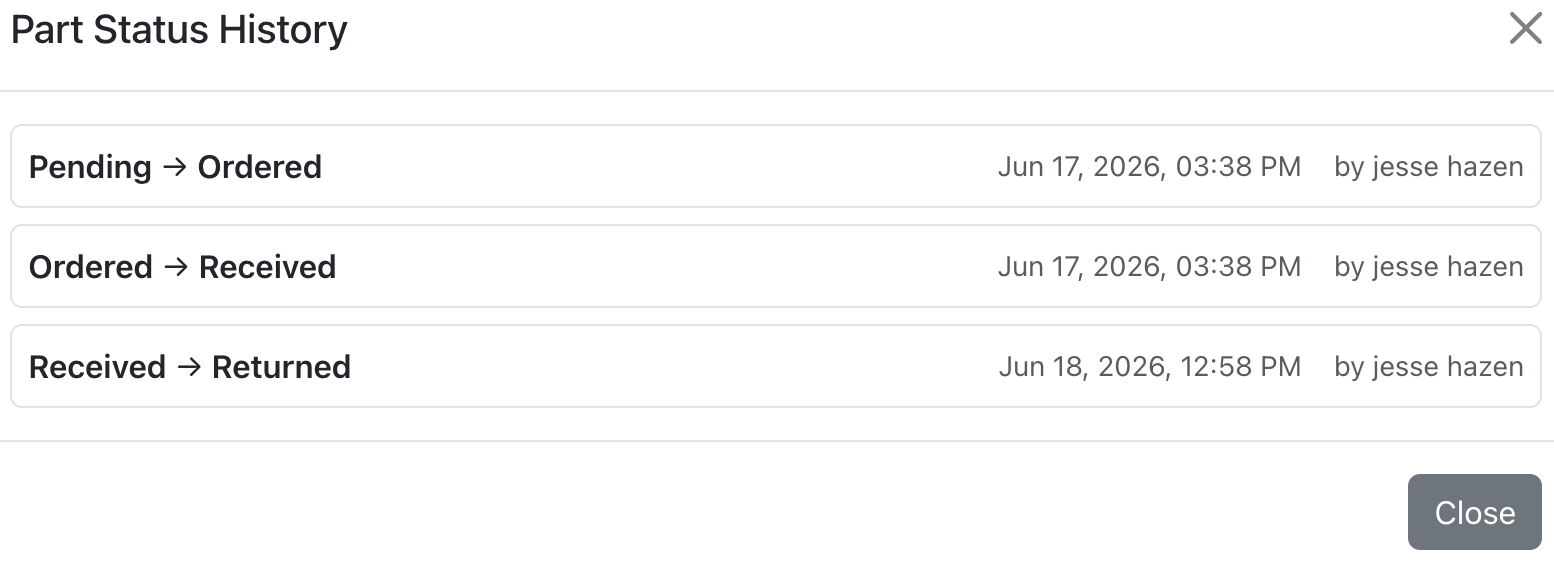
Every status change is recorded. You can view the full history for any part:
- Click on a part to open its detail view.
- The status history shows each transition — previous status, new status, when it changed, and who made the change.
This provides a complete audit trail for parts procurement.
Vendors
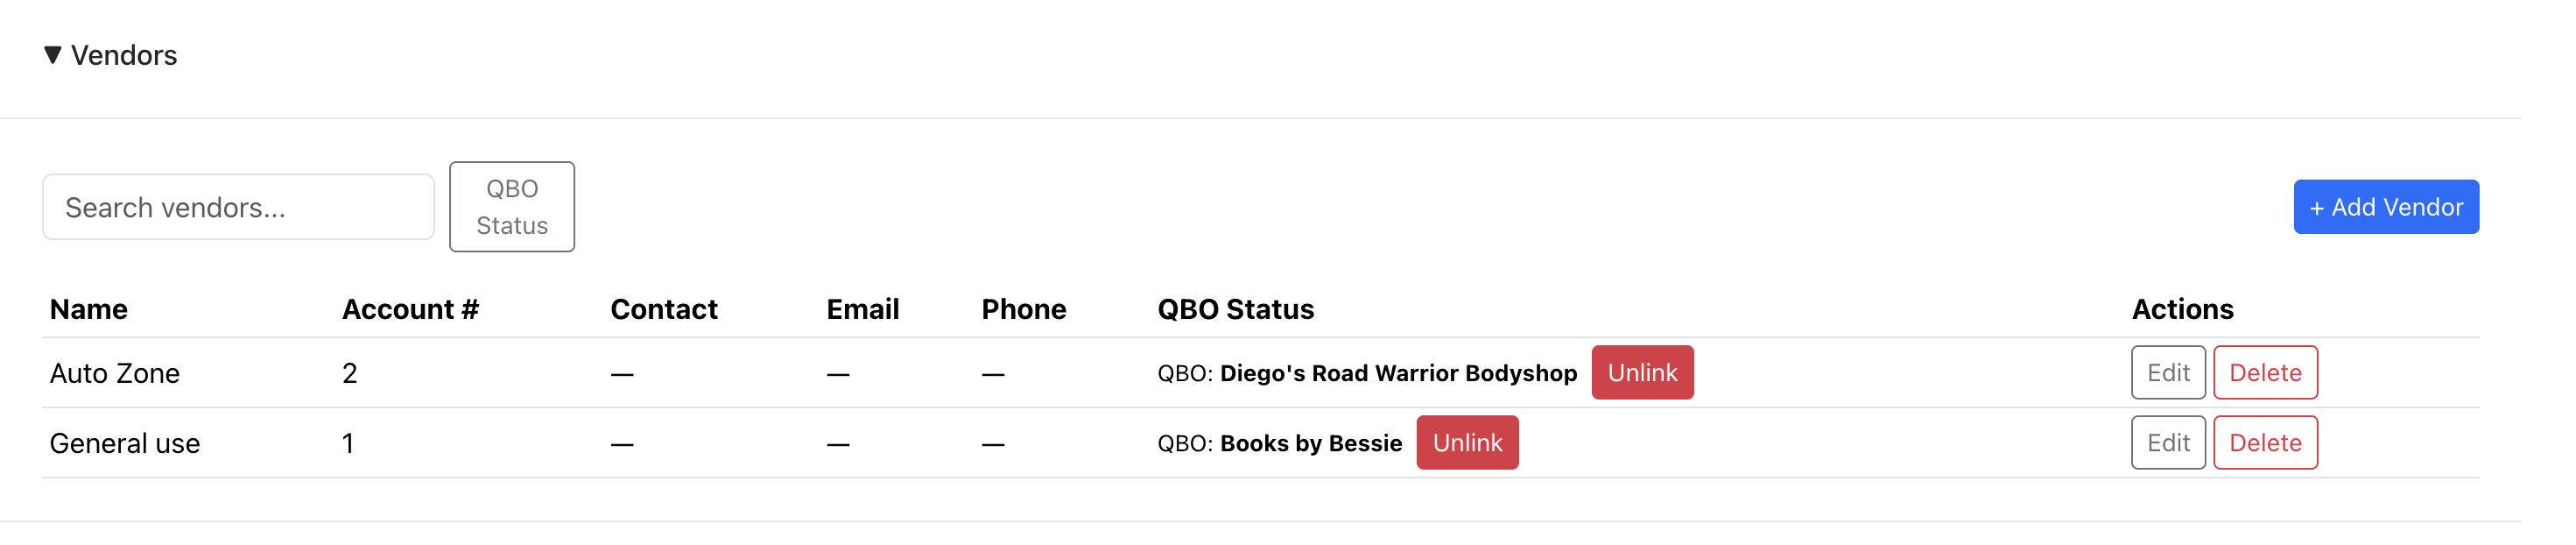
The parts board integrates with vendor management. You can assign vendors to parts to track where each part was sourced from.
- Assign Vendor — Select a vendor for any part from the vendor dropdown on the part card or in the line items detail view.
- Cost Export — View a breakdown of parts grouped by vendor, showing total cost per vendor. This is useful for reconciling vendor invoices.
- QuickBooks Integration — Vendors can be linked to QBO vendors for seamless expense tracking.