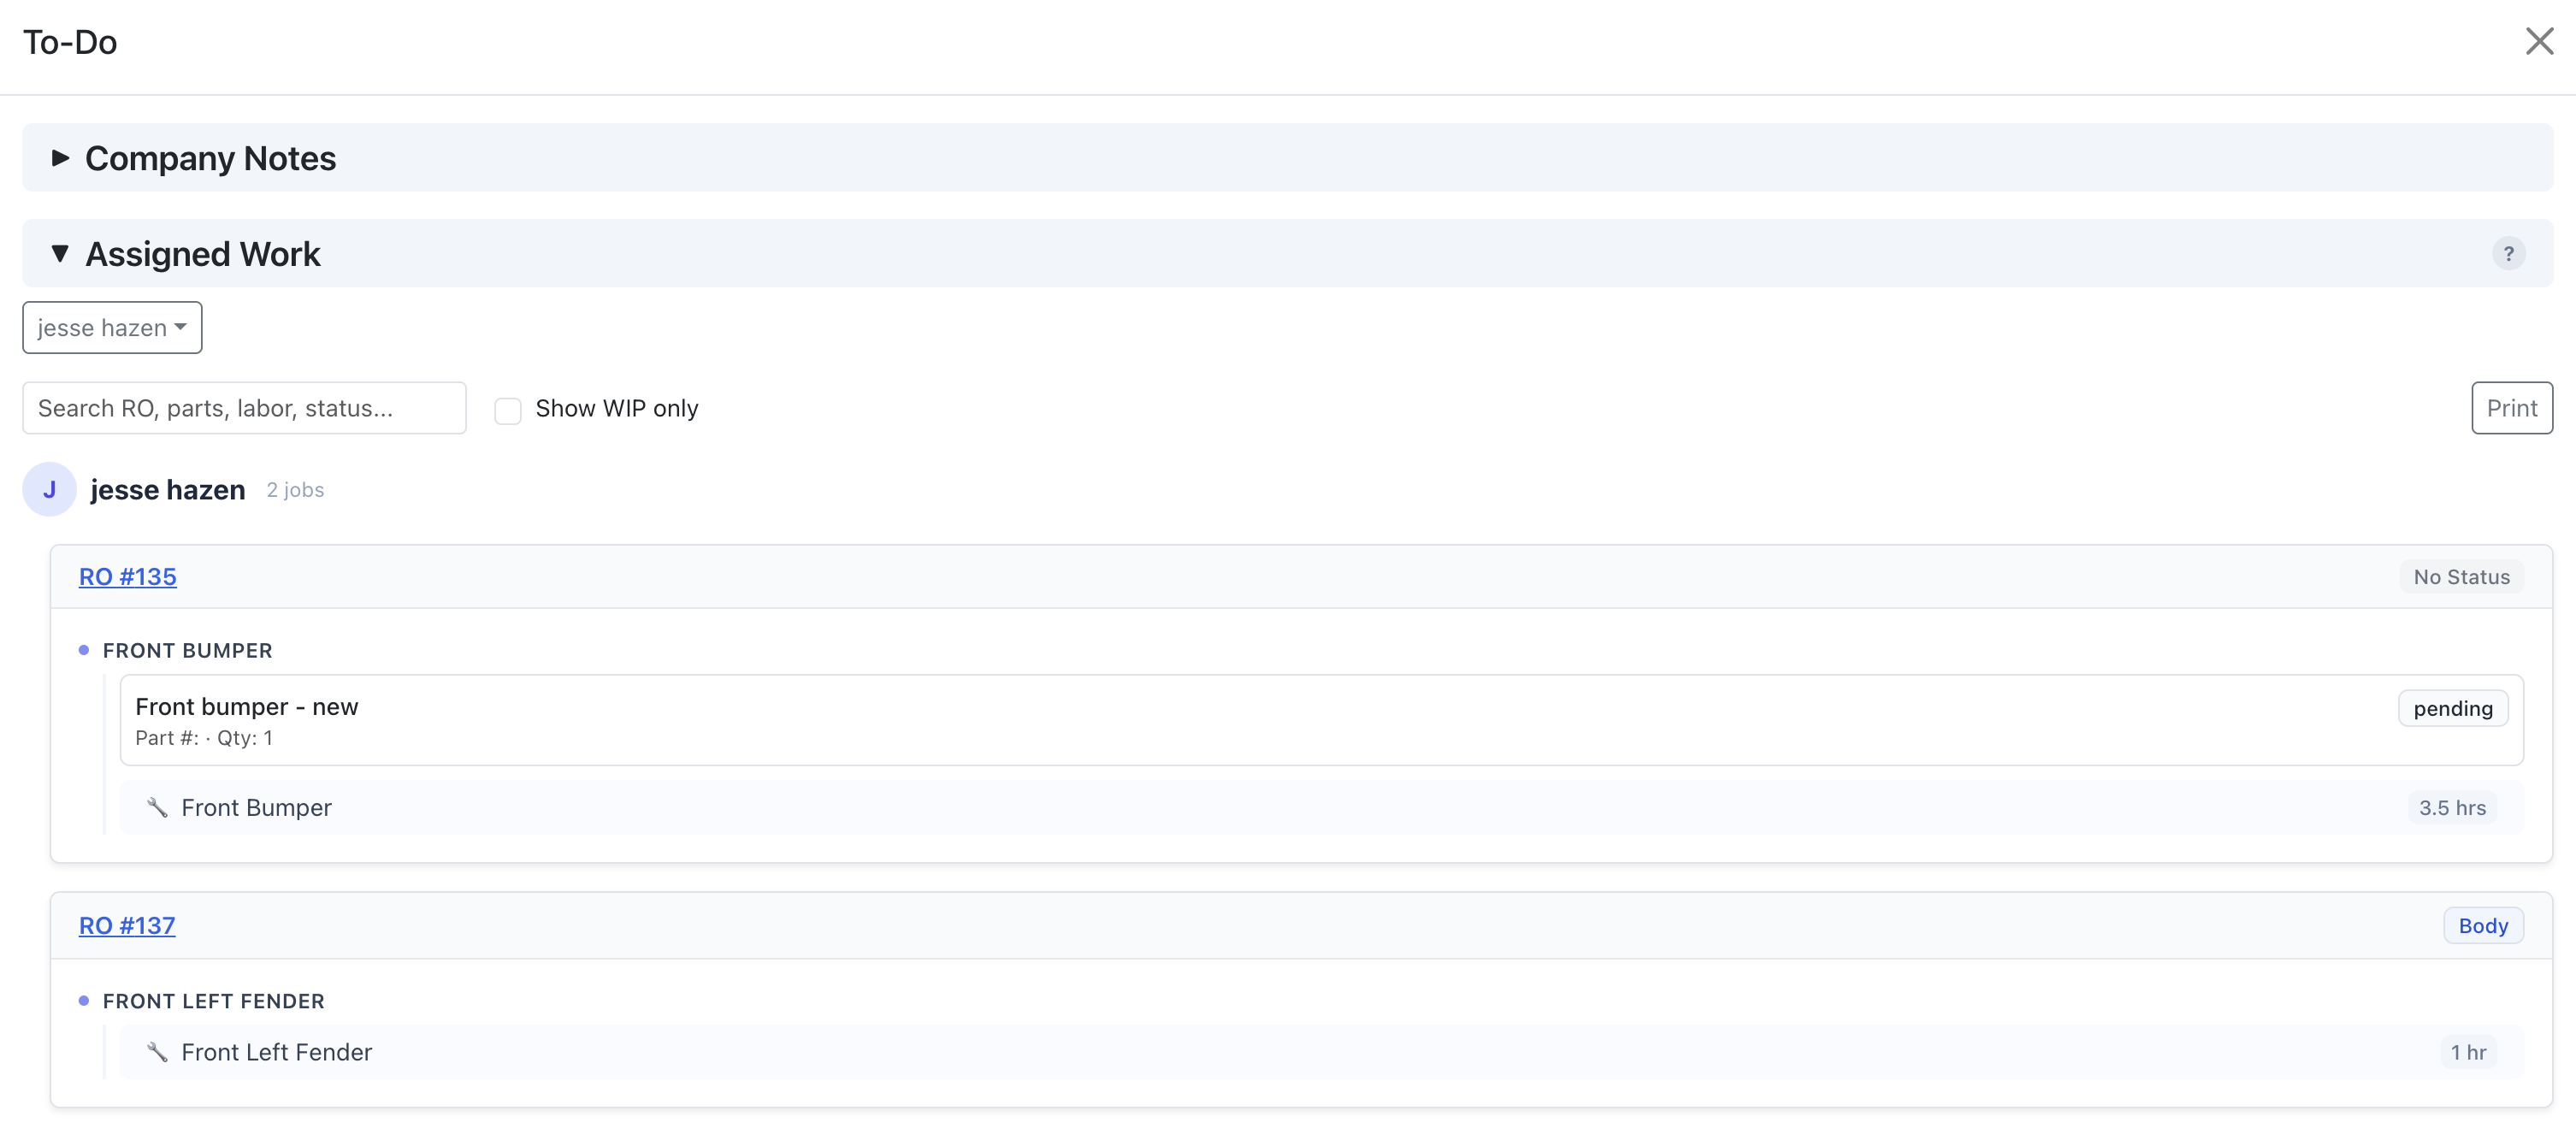
Jobs
Jobs Display
Overview: The Jobs view lists all your jobs. Click on any row to open the details. You can see controls like adding a job or settings to change the layout.
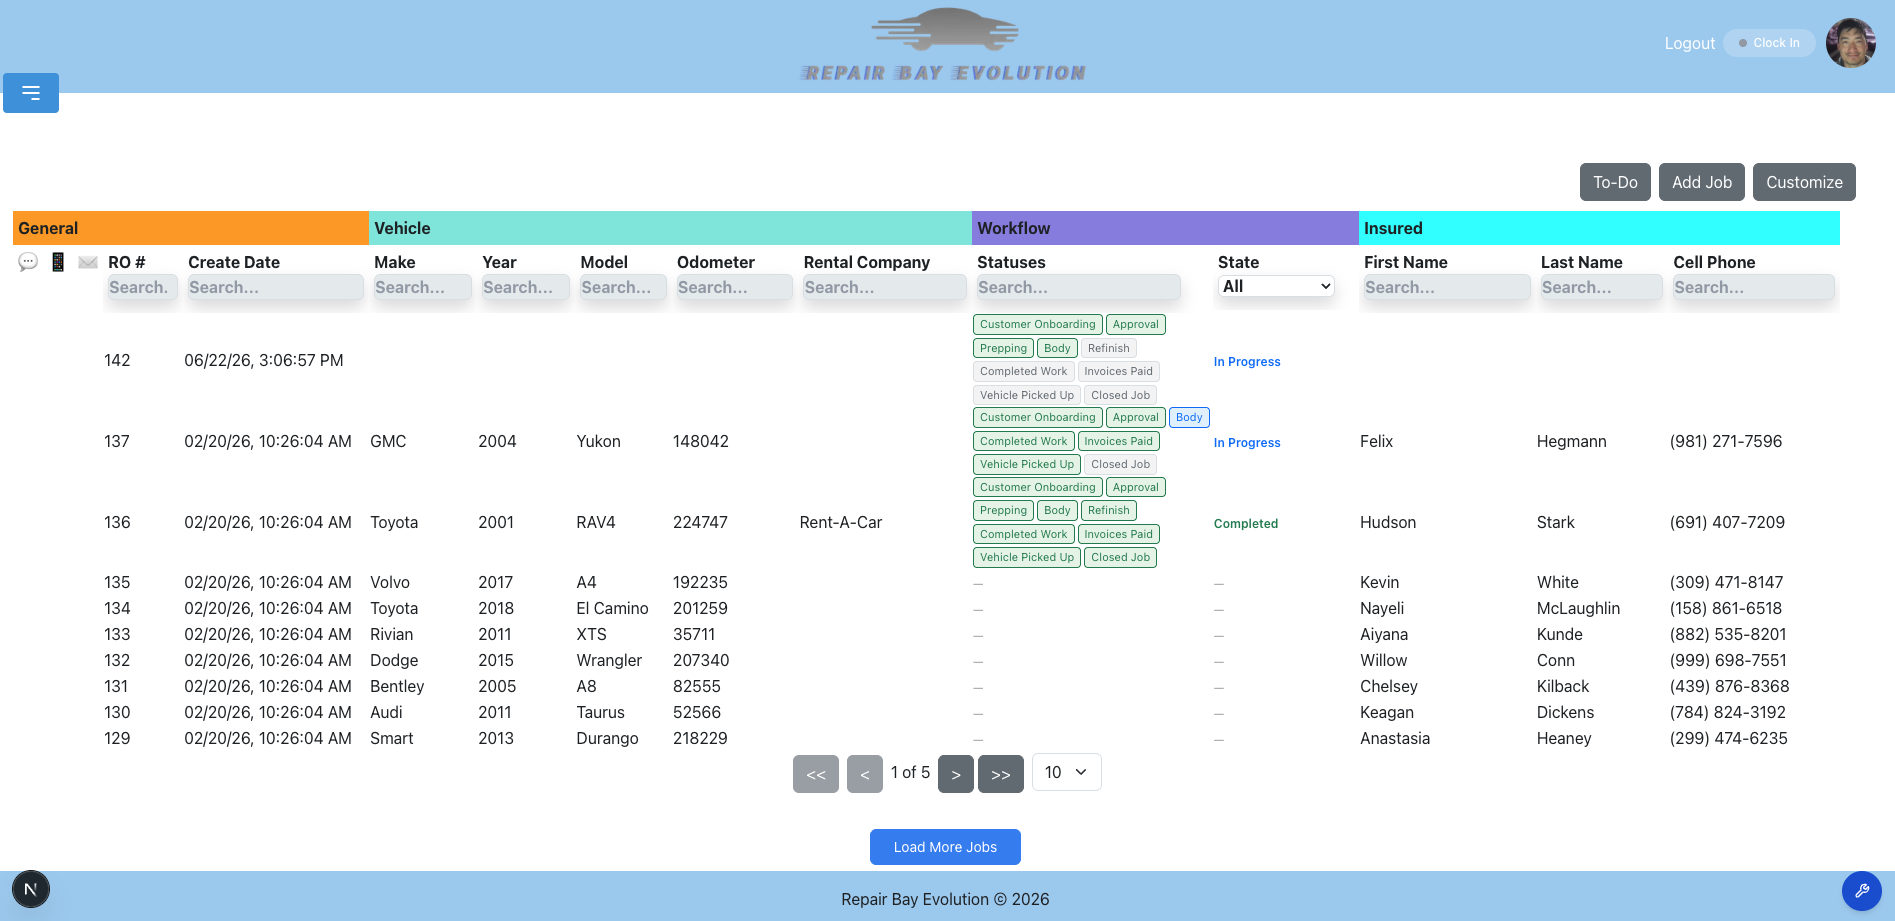
Add a Job
- Click the "Add Job" button.
- A new blank row will appear in the jobs view. This new job can now be used.
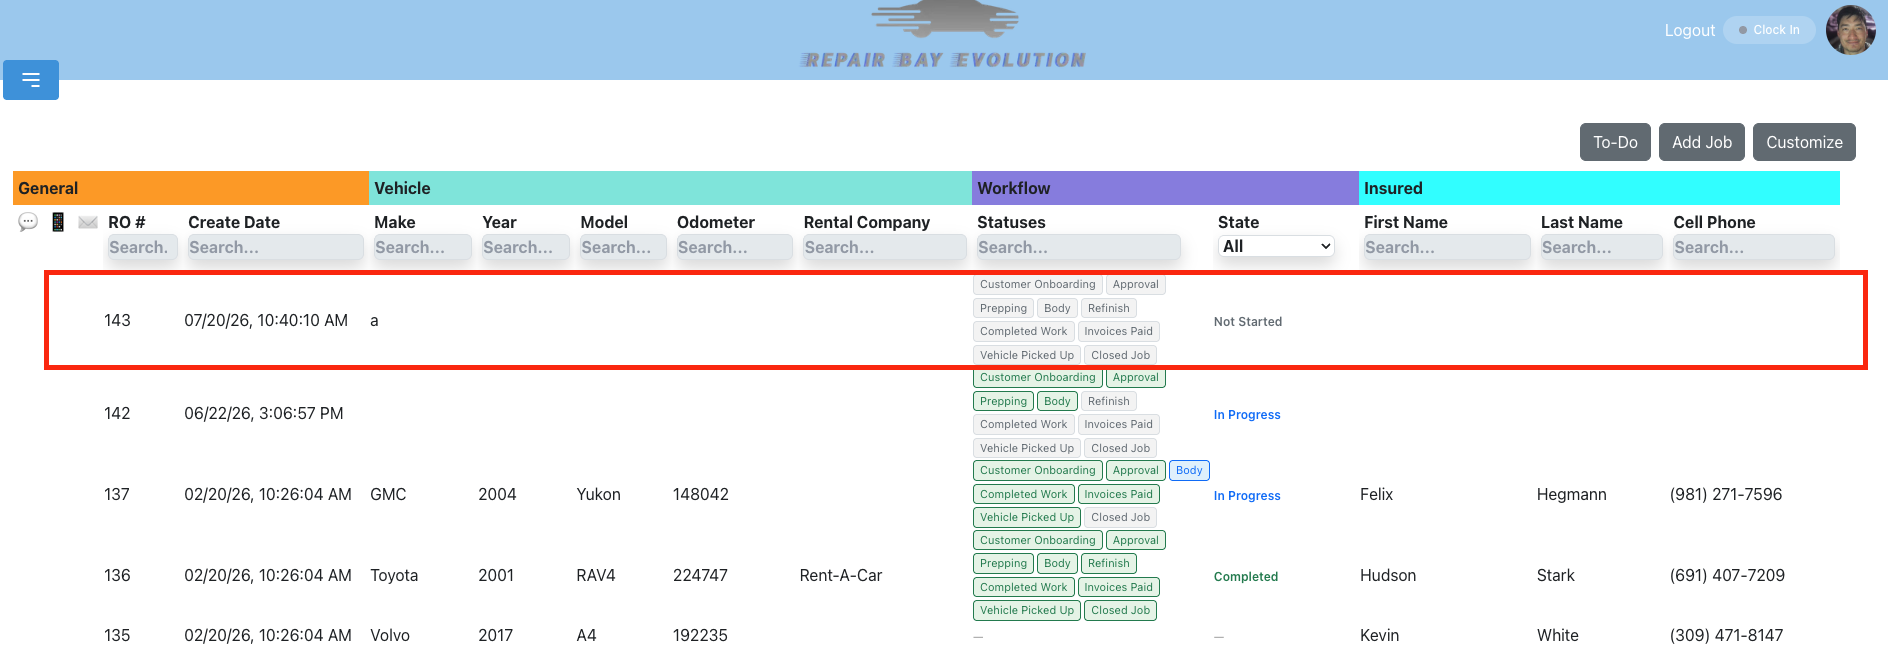
Jobs Display Settings
Customize which columns are displayed. These settings are saved on your device.
- In the jobs view, click the "Customize" button.

- You will see categories like Vehicle, Owner, and Insured. Click on a category.
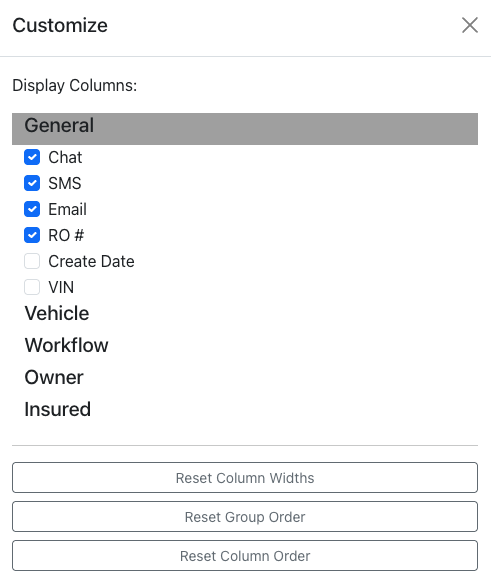
- Toggle columns on or off. Changes are saved automatically.
Resize Columns
Adjust the width of any column to fit your data.
- Hover over the right edge of a column header until you see a blue resize handle.
- Click and drag left or right to resize the column.
- Release the mouse to set the new width.
Column widths are saved automatically and will persist across page refreshes. To reset all column widths to their defaults, open the Customize modal and click Reset Column Widths.
Note: The chat, SMS, and email indicator columns have a fixed width and cannot be resized.
Reorder Columns
Rearrange columns within their group by dragging them.
- Click and hold the column header label (e.g. "Make", "Year").
- Drag it over another column header in the same group.
- Release to drop the column in its new position.
Columns can only be reordered within their group — for example, you can move "Year" before "Make" in the Vehicle group, but you cannot move it into the Insured group.
To reset column order, open the Customize modal and click Reset Column Order.
Reorder Column Groups
Rearrange entire column groups (General, Vehicle, Insured, Owner, Workflow).
- Click and hold a group header (e.g. "Vehicle", "Insured").
- Drag it over another group header.
- Release to drop the group in its new position.
Group order is saved automatically. If all columns in a group are hidden, the group's position is preserved for when columns are re-enabled.
To reset group order, open the Customize modal and click Reset Group Order.
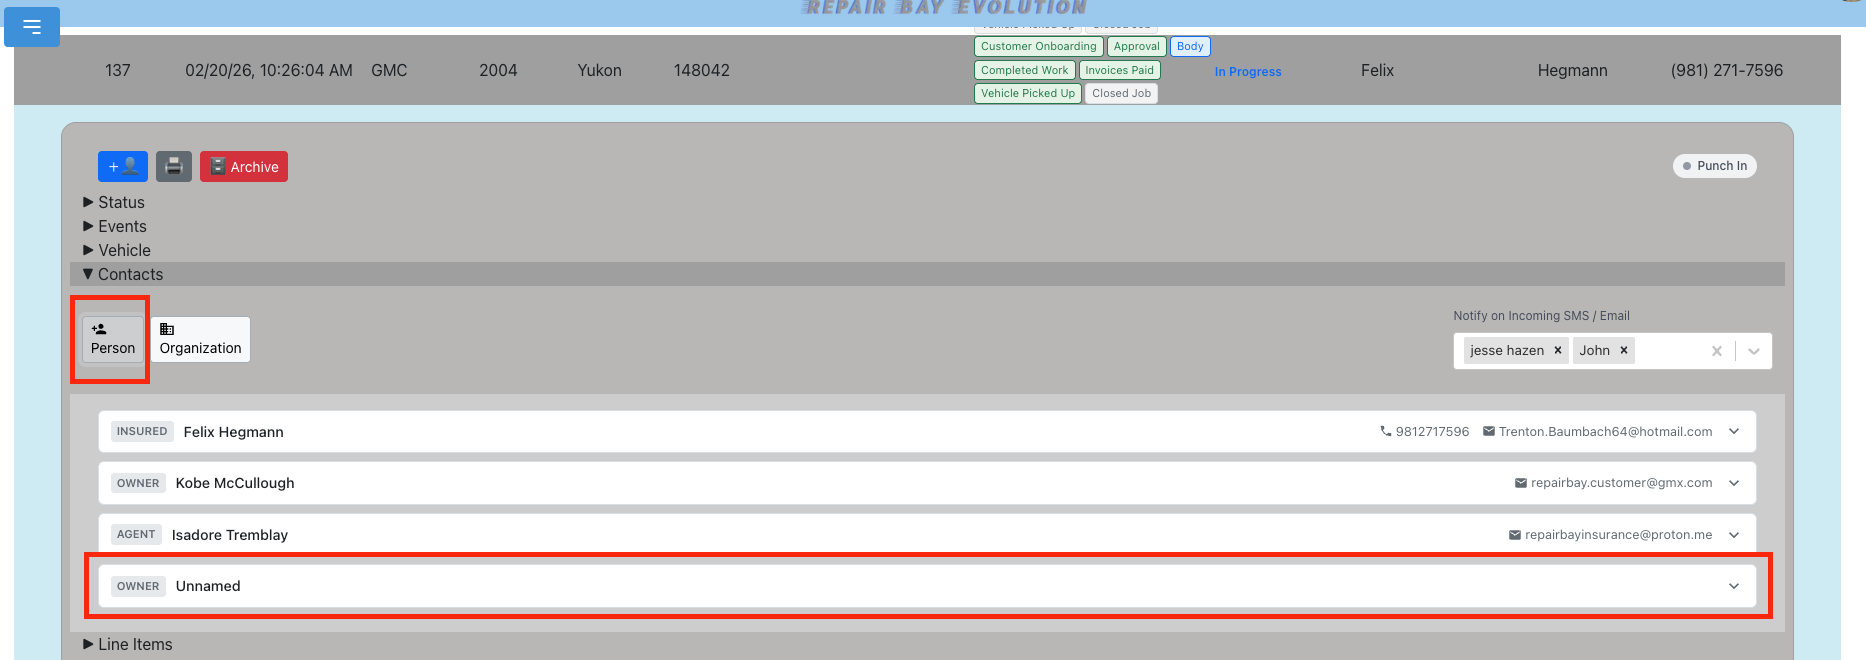
Add Parties to a Job
Overview: A party is anyone associated with a job — insured customer, owner, insurance agent, adjuster, or organizations like rental companies.
- Add Person — Add an individual such as an insurance agent, adjuster, vehicle owner, or insured person.
- Add Organization — Add any company associated with the job.
Create a Communication Method
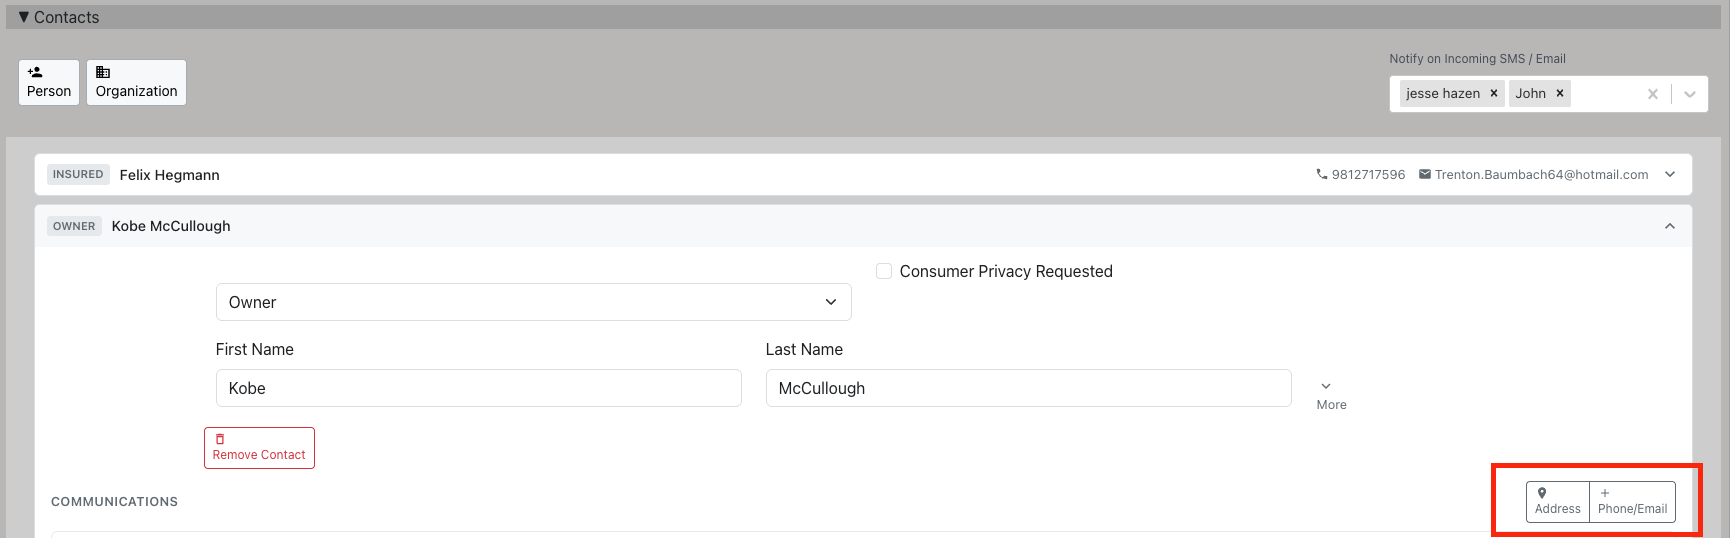
Overview: There are two data types for contacting a party: an address or other (phone number or email).
- Click on the Job.
- Click on Contacts.
- Find the contact you wish to add a method for.
- Click on either Add Address or Add Other Communication.
Give Portal Access
Overview: Give insurance or customer users access to view a job on their portal. You can still send emails and sms messages without giving portal access.
- Select a job and click on Contacts.
- Find the person you wish to give access to.
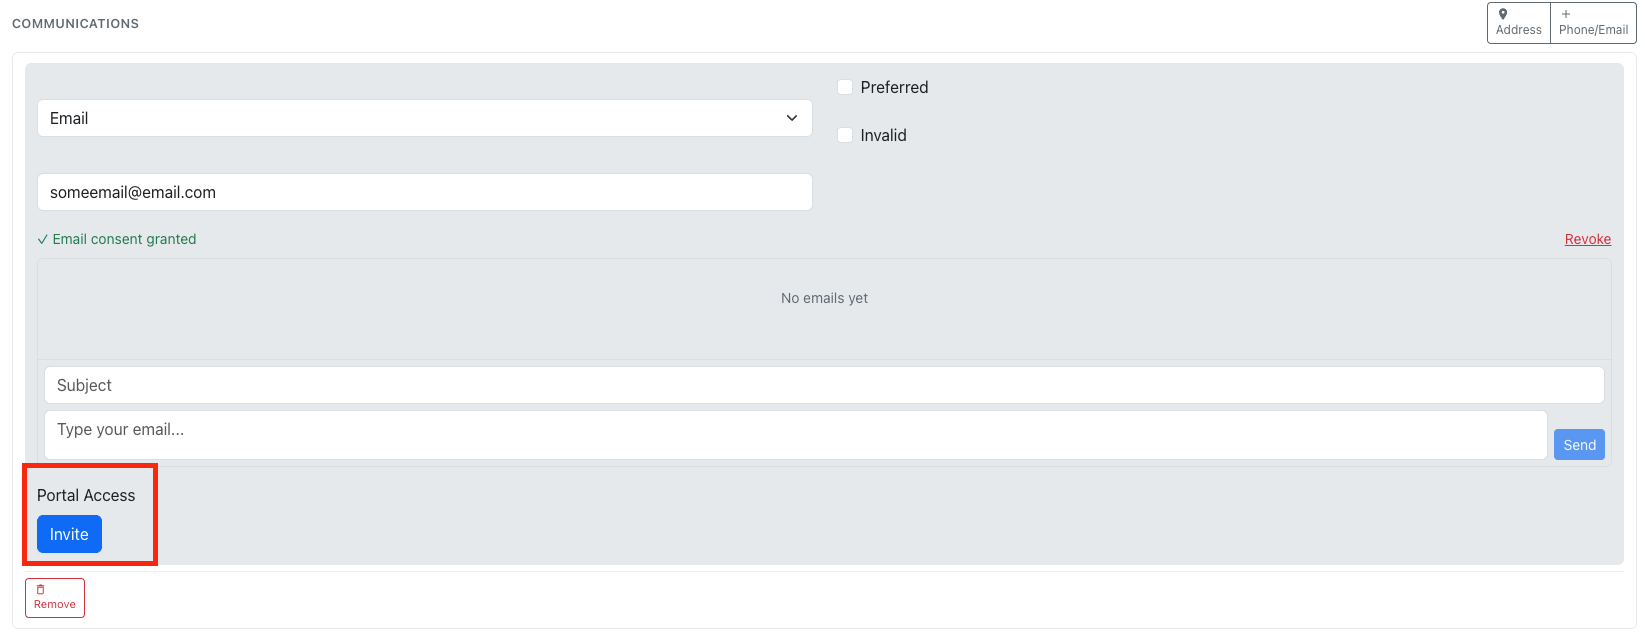
- Find the contact method with the type of "Email" or create one.
- Verify the type is either agent/adjuster (insurance portal) or owner/insured (customer portal).
- Make sure the email is valid. They need your verbal or written consent before proceeding.
- Check the "Confirm Email Consent" checkbox to indicate you have received their consent. The "Invite" button will remain disabled until this is checked.
- Click "Invite". This generates an email with a username and temporary password.
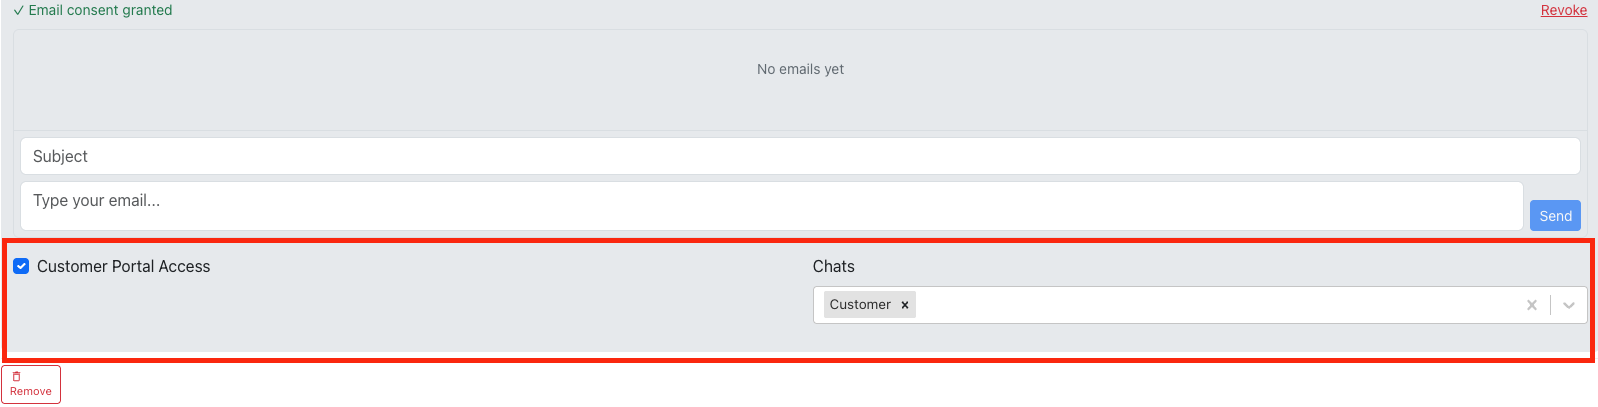
- Click on "Customer Portal Access" or "Insurance Portal Access".
- (Optional) Choose which chat rooms they will have access to for this job.
Notes
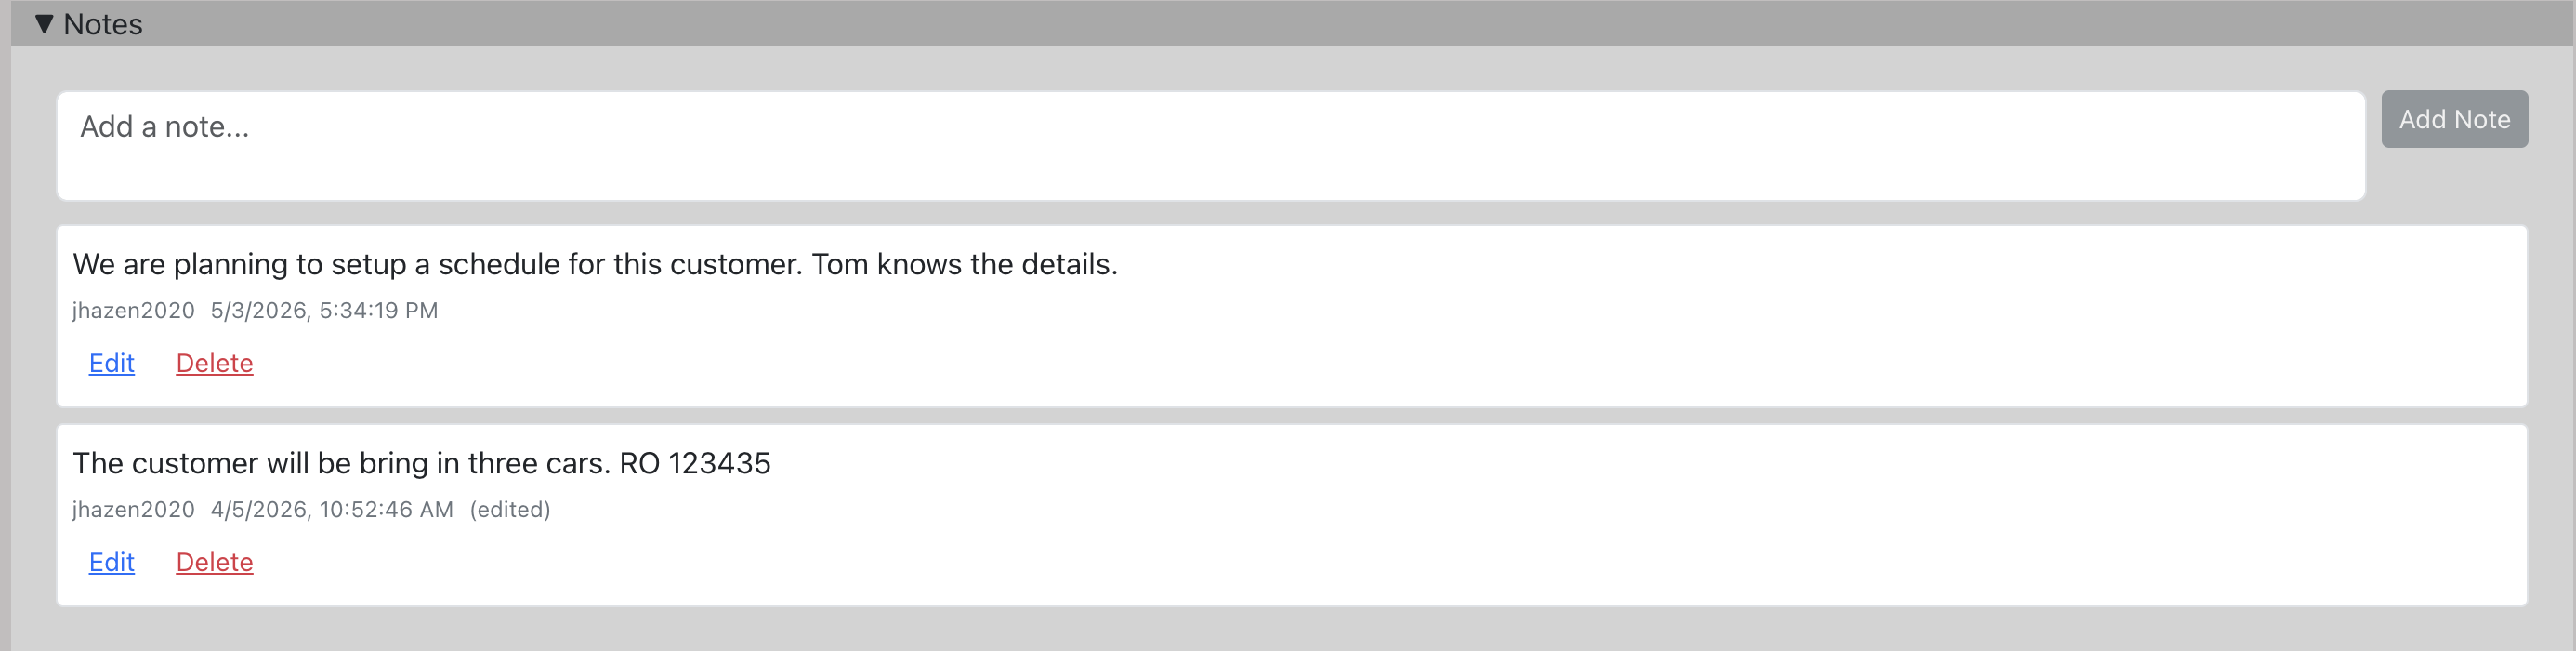
Overview: Add internal notes to any job. Notes track who created them and when, and can be edited or deleted.
- Click on a job.
- Click on the Notes tab.
- Type your note in the text area and click "Add Note".
- Use the Edit or Delete links on any existing note to modify or remove it.
Repair Events
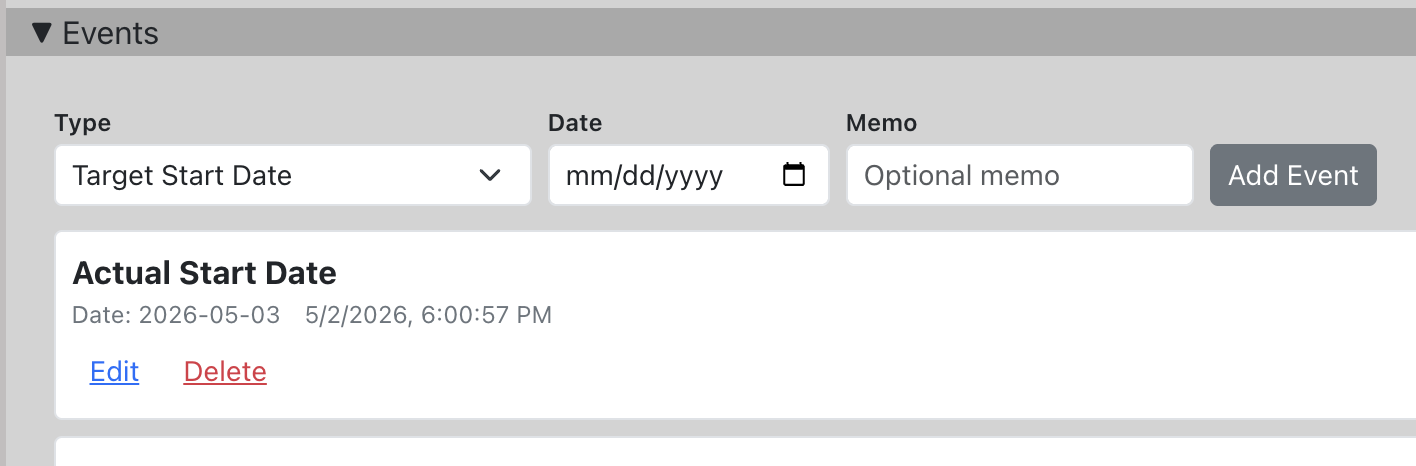
Overview: Track key milestones in the repair process. Events have a type, date, and optional memo.
- Click on a job.
- Click on the Repair Events tab.
- Select an event type from the dropdown, set a date, and optionally add a memo.
- Click "Add Event".
- Existing events can be edited or deleted.
To-Do Panel
Overview: The To-Do panel is a shop-wide heads-up board that pulls together what your team needs to be aware of, independent of any single job. It has three parts: Company Notes for shared reminders and action items, Upcoming Appointments so technicians can see what's on the schedule (with today called out first), and Assigned Work showing the parts and labor assigned to each technician across open jobs.
Accessing the To-Do Panel
- On the Jobs page, click the "To-Do" button in the left-side action bar (next to "Add Job" and "Customize").
- The To-Do panel opens with Company Notes, Upcoming Appointments, and Assigned Work. Each section can be collapsed or expanded independently by clicking its heading.
- Click the "To-Do" button again to close the panel.
Choosing Technicians
A single Technicians picker near the top of the panel scopes both the Upcoming Appointments and Assigned Work sections. It defaults to you (the signed-in user), so you see your own schedule and assignments right away.
- Open the dropdown to add or remove other technicians. Both sections update together.
- Choose All technicians at the top of the list to include everyone in one click, or clear it to deselect all.
- With no technician selected, the Upcoming Appointments and Assigned Work sections prompt you to pick one.
Company Notes
Company Notes are shared, company-wide notes visible to all shop users. The section opens showing pinned notes at the top followed by recent notes from the last 30 days.
Creating a Note
- With the To-Do panel open, type your note in the text area (up to 5,000 characters).
- Click "Add Note" to save. The note appears with your name and the current date.
Editing and Deleting Notes
- You can edit or delete your own notes using the controls on each note.
- Admin users can edit or delete any note regardless of who created it.
Pinning Notes
- Click the pin icon on a note to pin it to the top of the list.
- Pinned notes are always visible regardless of their age or any active date filter.
- Click the pin icon again to unpin.
Filtering by Date Range
- By default, the panel shows pinned notes and non-pinned notes from the last 30 days.
- Use the date range filter (start and end date) to view older notes.
- Click "Clear" to return to the default view.
Each note displays the author name ("Written by [name]") and the creation date. Pinned notes are visually distinguished with a pin icon.
Upcoming Appointments
This section lists the next 30 days of appointments for the selected technician(s), grouped by day. Today is pulled to the top and highlighted with a "TODAY" badge so it's the first thing you read, even when there are a lot of future bookings behind it.
- Each row shows the time, appointment type, RO# and vehicle, assigned technician, and status.
- Click a row tied to a repair order to jump straight to that job.
- Use the shared Technicians picker above to change whose appointments you see, or pick All technicians for the whole shop's schedule.
Assigned Work
This section shows the parts and labor assigned to the selected technician(s) across open jobs, grouped by technician. It's the quickest way to see what each tech has queued up.
- Search by RO#, part name, status, or description to narrow the list.
- Turn on Show WIP only to see just the jobs with an active (in-progress) workflow status.
- Status badges show at a glance where each job stands: In Progress, Not Started, Awaiting Next Status, or Completed.
- Use Print to produce a clean, per-technician worksheet of the current list.