Core Charges
Overview
A core charge (also called a core deposit) is a refundable fee added to a part when the vendor expects the old part returned. If you return the old core within the vendor's deadline, you receive a credit. If you miss the deadline, you forfeit the deposit.
Repair Bay Evolution tracks core charges from the moment a part is added to a job all the way through return and credit. The system alerts you before deadlines expire so you never lose money on missed returns.
Key capabilities include:
- Attach a core charge to any part line item with an amount and due date
- See all outstanding core charges across every job in one place
- Get alerts when cores are expiring soon or overdue
- Mark cores as returned and track when credit is received
- Verify return eligibility (likely eligible, confirmed, rejected)
- Run reports on total core charge exposure by vendor, date range, or status
- Identify slow-cycling inventory items that accumulate unreturned cores
- View full core charge history with return rate metrics
How Core Charges Work
When you order a remanufactured or rebuilt part (alternators, starters, brake calipers, etc.), the vendor typically charges a core deposit. This deposit is refunded when the old (used) part is shipped back within a specified window.
The Core Charge Lifecycle
- Part ordered — A core charge is created with the deposit amount and optional due date.
- Active — The core is outstanding. The old part needs to be returned.
- Expiring soon — The due date is approaching (within your configured threshold).
- Returned — You've shipped or delivered the old core back to the vendor.
- Credit received — The vendor has issued the refund or credit memo.
If a core is never returned, it becomes overdue once the due date passes. This means the deposit is likely forfeited unless the vendor grants an extension.
Adding a Core Charge
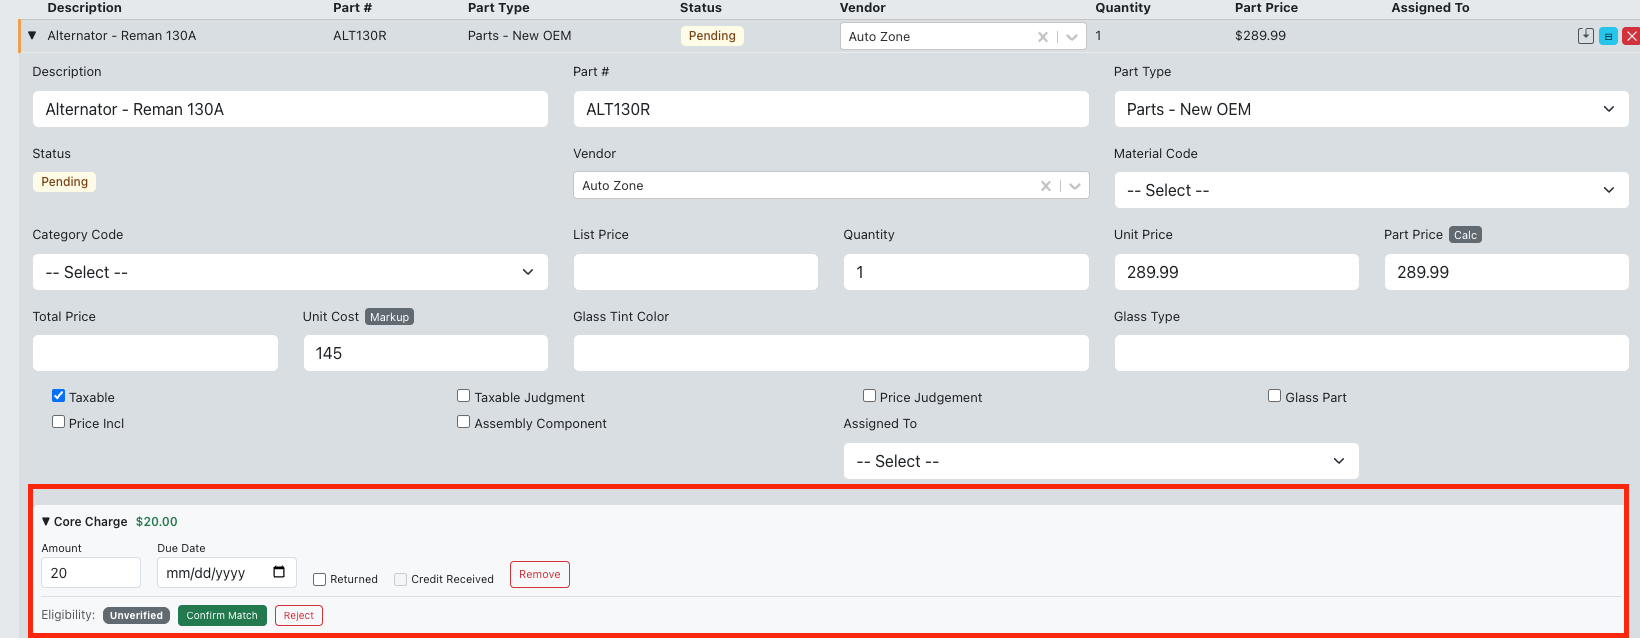
Overview: Core charges are attached to individual parts on a job's line items. You can add a core charge when creating or editing any part.
- Navigate to a job and open the Line Items tab.
- Add a new part or click an existing part to edit it.
- In the part detail panel, look for the Core Charge section.
- Enter the Amount — the deposit charged by the vendor.
- Enter the Due Date (optional) — the deadline to return the old core for a refund.
- Save the part. The core charge is now tracked.
If the part is linked to an inventory item, the core charge is also associated with that item for reporting purposes.
Tip: Always set a due date when the vendor provides one. Without a due date, the system can still track the core charge but cannot alert you before it expires.
Core Charges Tab
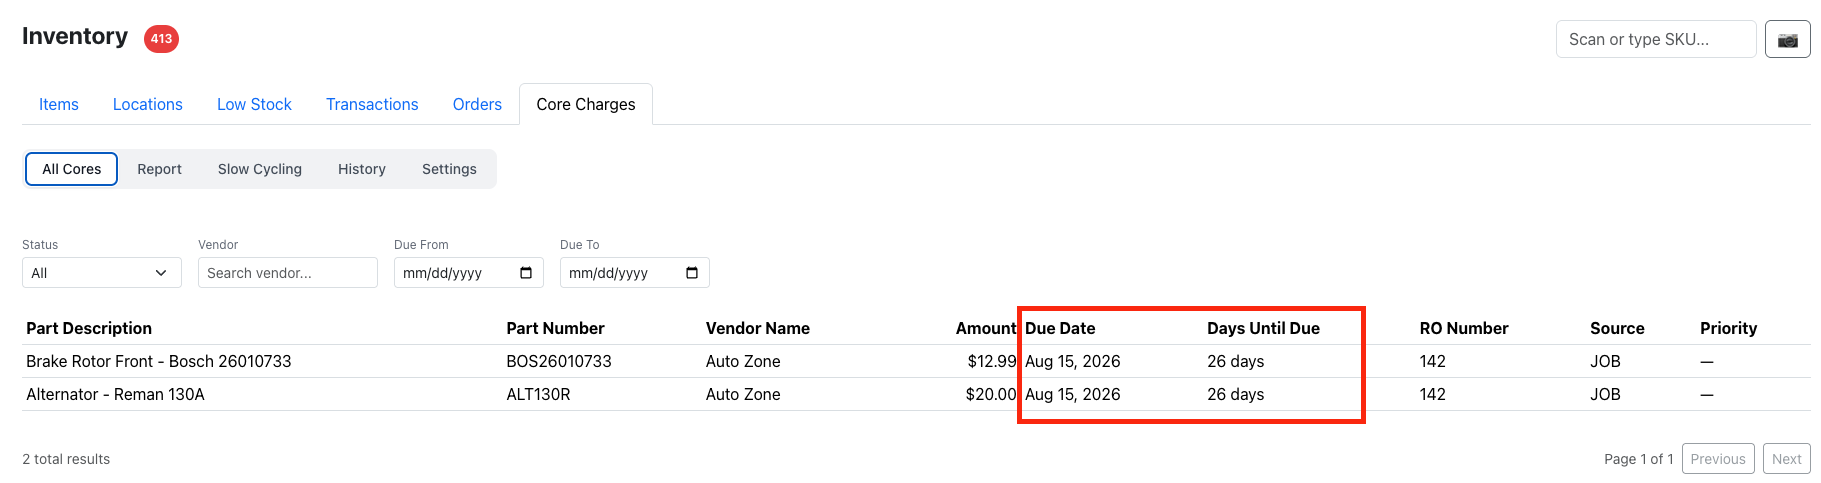
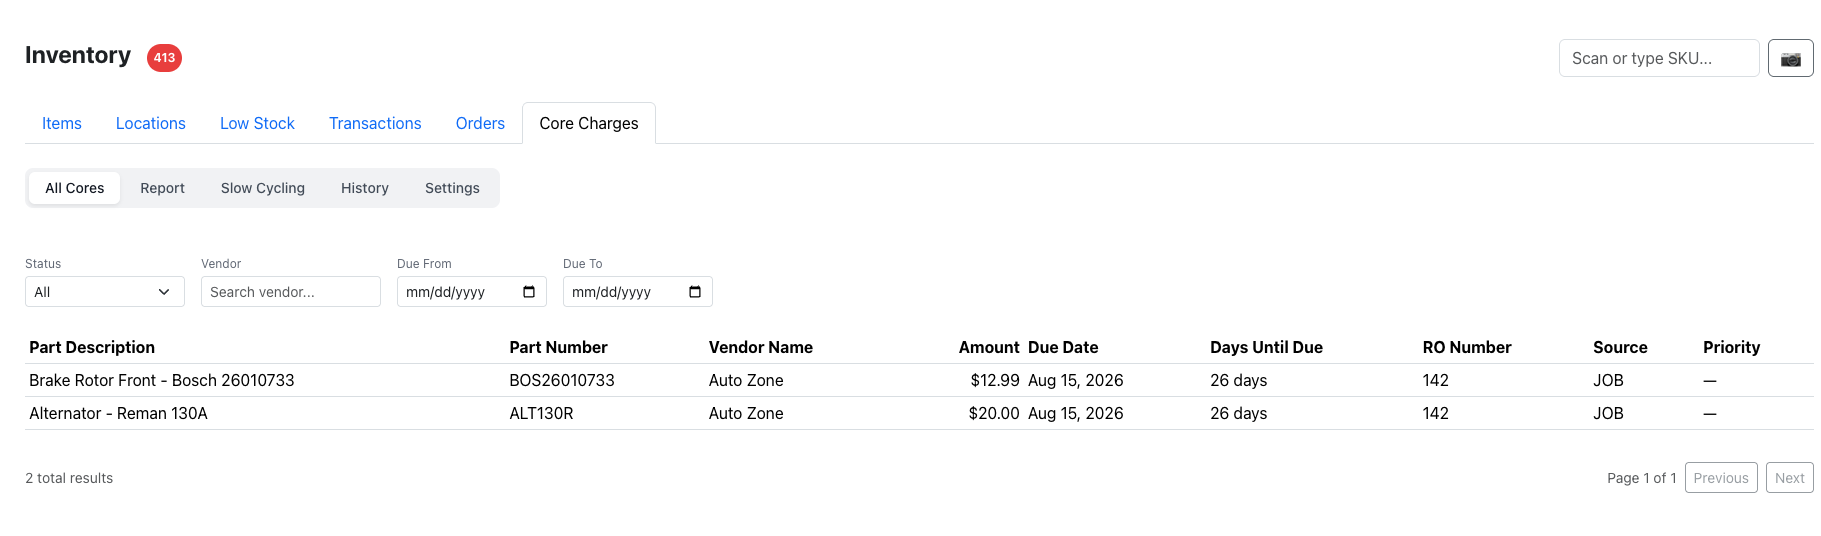
Overview: The Core Charges tab lives within the Inventory section and gives you a single view of every outstanding core charge across all jobs in your shop.
- Navigate to Inventory from the side menu.
- Click the Core Charges tab.
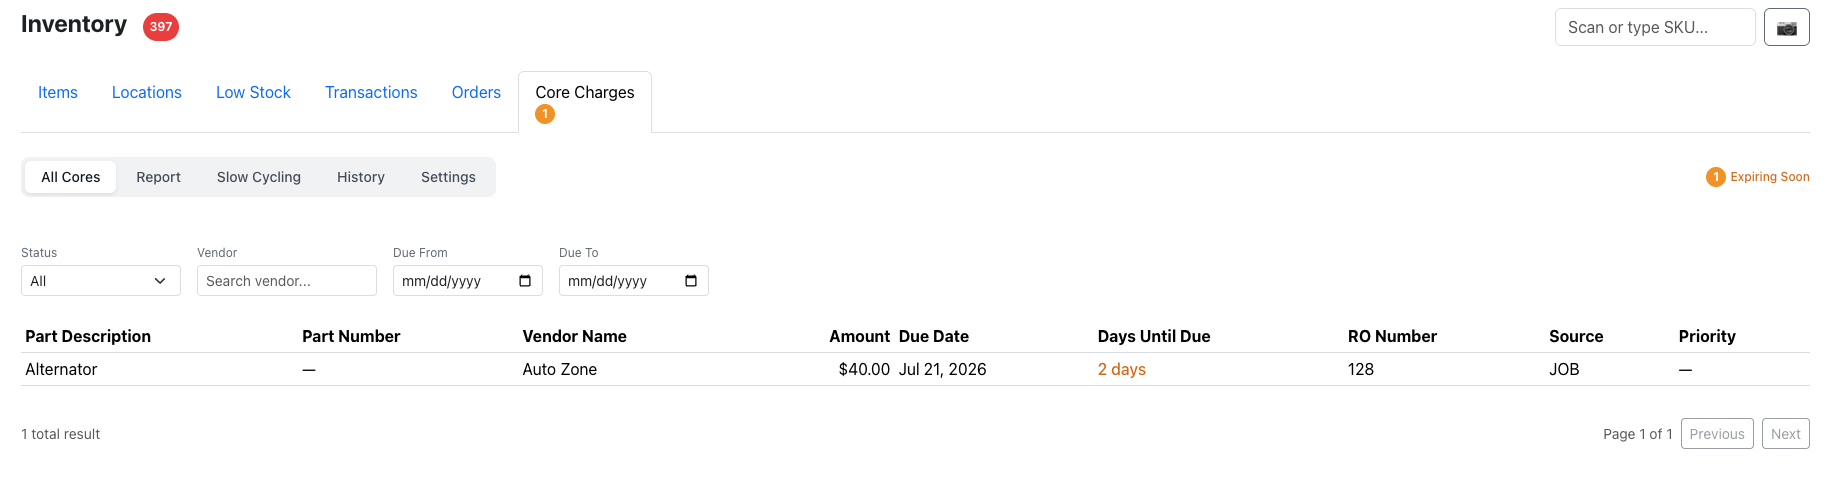
The tab shows alert badges indicating how many cores are expiring soon (amber) and how many are overdue (red). These counts update automatically every 60 seconds.
From here you can:
- View all active, expiring, overdue, and returned core charges
- Filter by status, vendor, date range, or inventory item
- Sort by due date, amount, or days outstanding
- Click any row to jump to the related job/part
- Mark cores as returned or record credit received
Expiring & Overdue Alerts
Overview: The system continuously monitors core charge due dates and flags items that need attention.
| Status | Color | Meaning |
|---|---|---|
| Active | Gray | Due date is in the future, beyond the expiration threshold. |
| Expiring Soon | Amber | Due date is within the configured threshold (default: 7 days). |
| Overdue | Red | Due date has passed. Credit may be forfeited. |
| Returned | Green | Core has been returned to the vendor. |
Alert counts appear as badges on the Core Charges tab so you can spot problems without opening the tab. The threshold for "expiring soon" is configurable in settings.
Returning a Core
Overview: When you ship or hand back the old part to the vendor, mark the core charge as returned so it stops appearing in your active list.
- Open the Core Charges tab in Inventory.
- Find the core charge you're returning (use filters or search).
- Click the row or the Mark Returned action.
- Confirm the return. The system records the return date automatically.
After marking a core as returned, it moves to the "Returned" status and no longer counts toward your expiring/overdue alerts. You'll still see it in the list when filtering for returned cores, so you can track it until credit is received.

Credit Received
Overview: After a core is returned, the vendor issues a credit (refund of the deposit). Recording this closes the loop on the core charge lifecycle.
- In the Core Charges tab, filter by Returned status.
- Find the core charge that has been credited.
- Click Mark Credit Received.
- The system records the credit date and the core charge is considered fully resolved.
Fully resolved core charges (returned + credit received) are excluded from active views but remain in history and reports for audit purposes.

Return Eligibility
Overview: Not every old core qualifies for a return. The eligibility field helps you track whether a core will actually be accepted by the vendor.
| Eligibility | Color | Meaning |
|---|---|---|
| Likely Eligible | Blue | Default assumption — most cores from this vendor are returnable. |
| Unverified | Gray | Eligibility hasn't been checked yet. |
| Confirmed | Green | Vendor has confirmed this specific core qualifies for return. |
| Rejected | Red | Vendor rejected the core (damaged, wrong part, etc.). |
When a core is rejected, you can record a rejection reason (e.g., "cracked housing", "wrong part number"). This helps identify patterns with specific vendors or part types.
Confirming or Rejecting Eligibility
- Open the core charge detail.
- Click Confirm Match if the vendor accepts the core, or Reject if they don't.
- If rejecting, enter a reason.
- The eligibility badge updates immediately.

Core Charge Reports
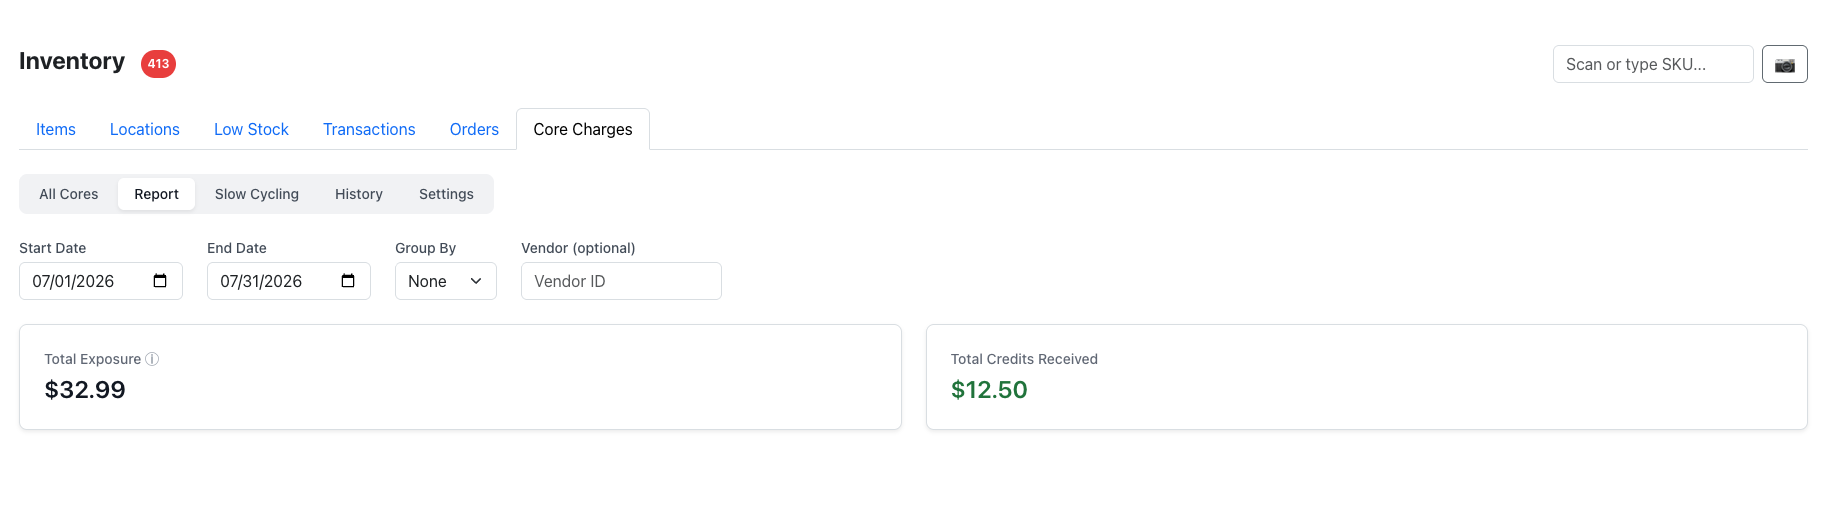
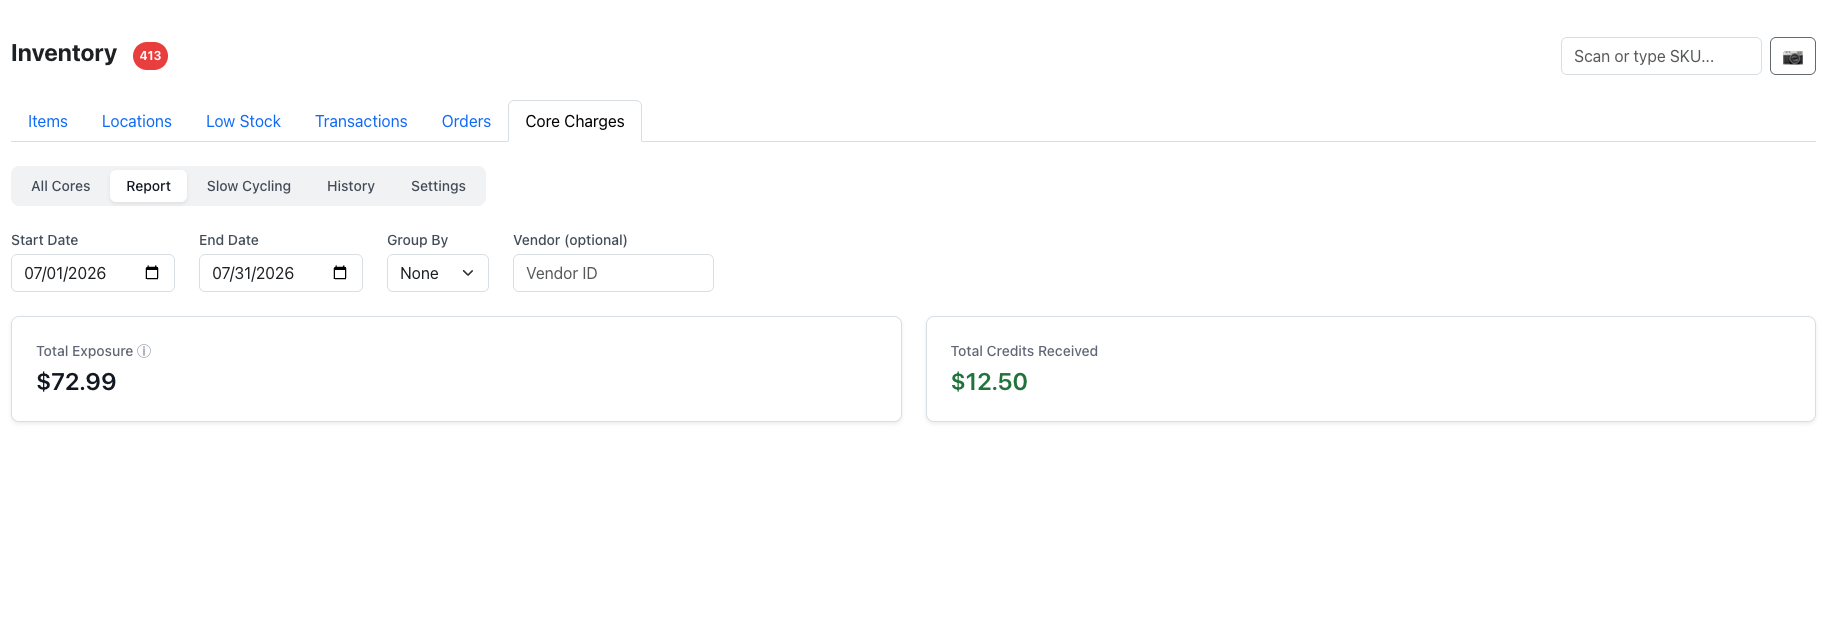
Overview: The report view shows your total core charge exposure grouped by vendor, status, inventory item, or time period. Use it to understand how much money is tied up in outstanding cores.
Running a Report
- In the Core Charges tab, click Reports.
- Select your date range (up to 365 days).
- Optionally group by Vendor, Status, or Inventory Item.
- Optionally filter by a specific vendor.
- The report displays:
- Total charges — sum of all core charge amounts in range
- Total returned — sum of charges that were returned
- Total credited — sum of charges that received credit
- Total outstanding — charges still active or overdue
Reports help you identify vendors with high core charges, track your return rate over time, and spot periods where cores are going unresolved.
Slow-Cycling Inventory
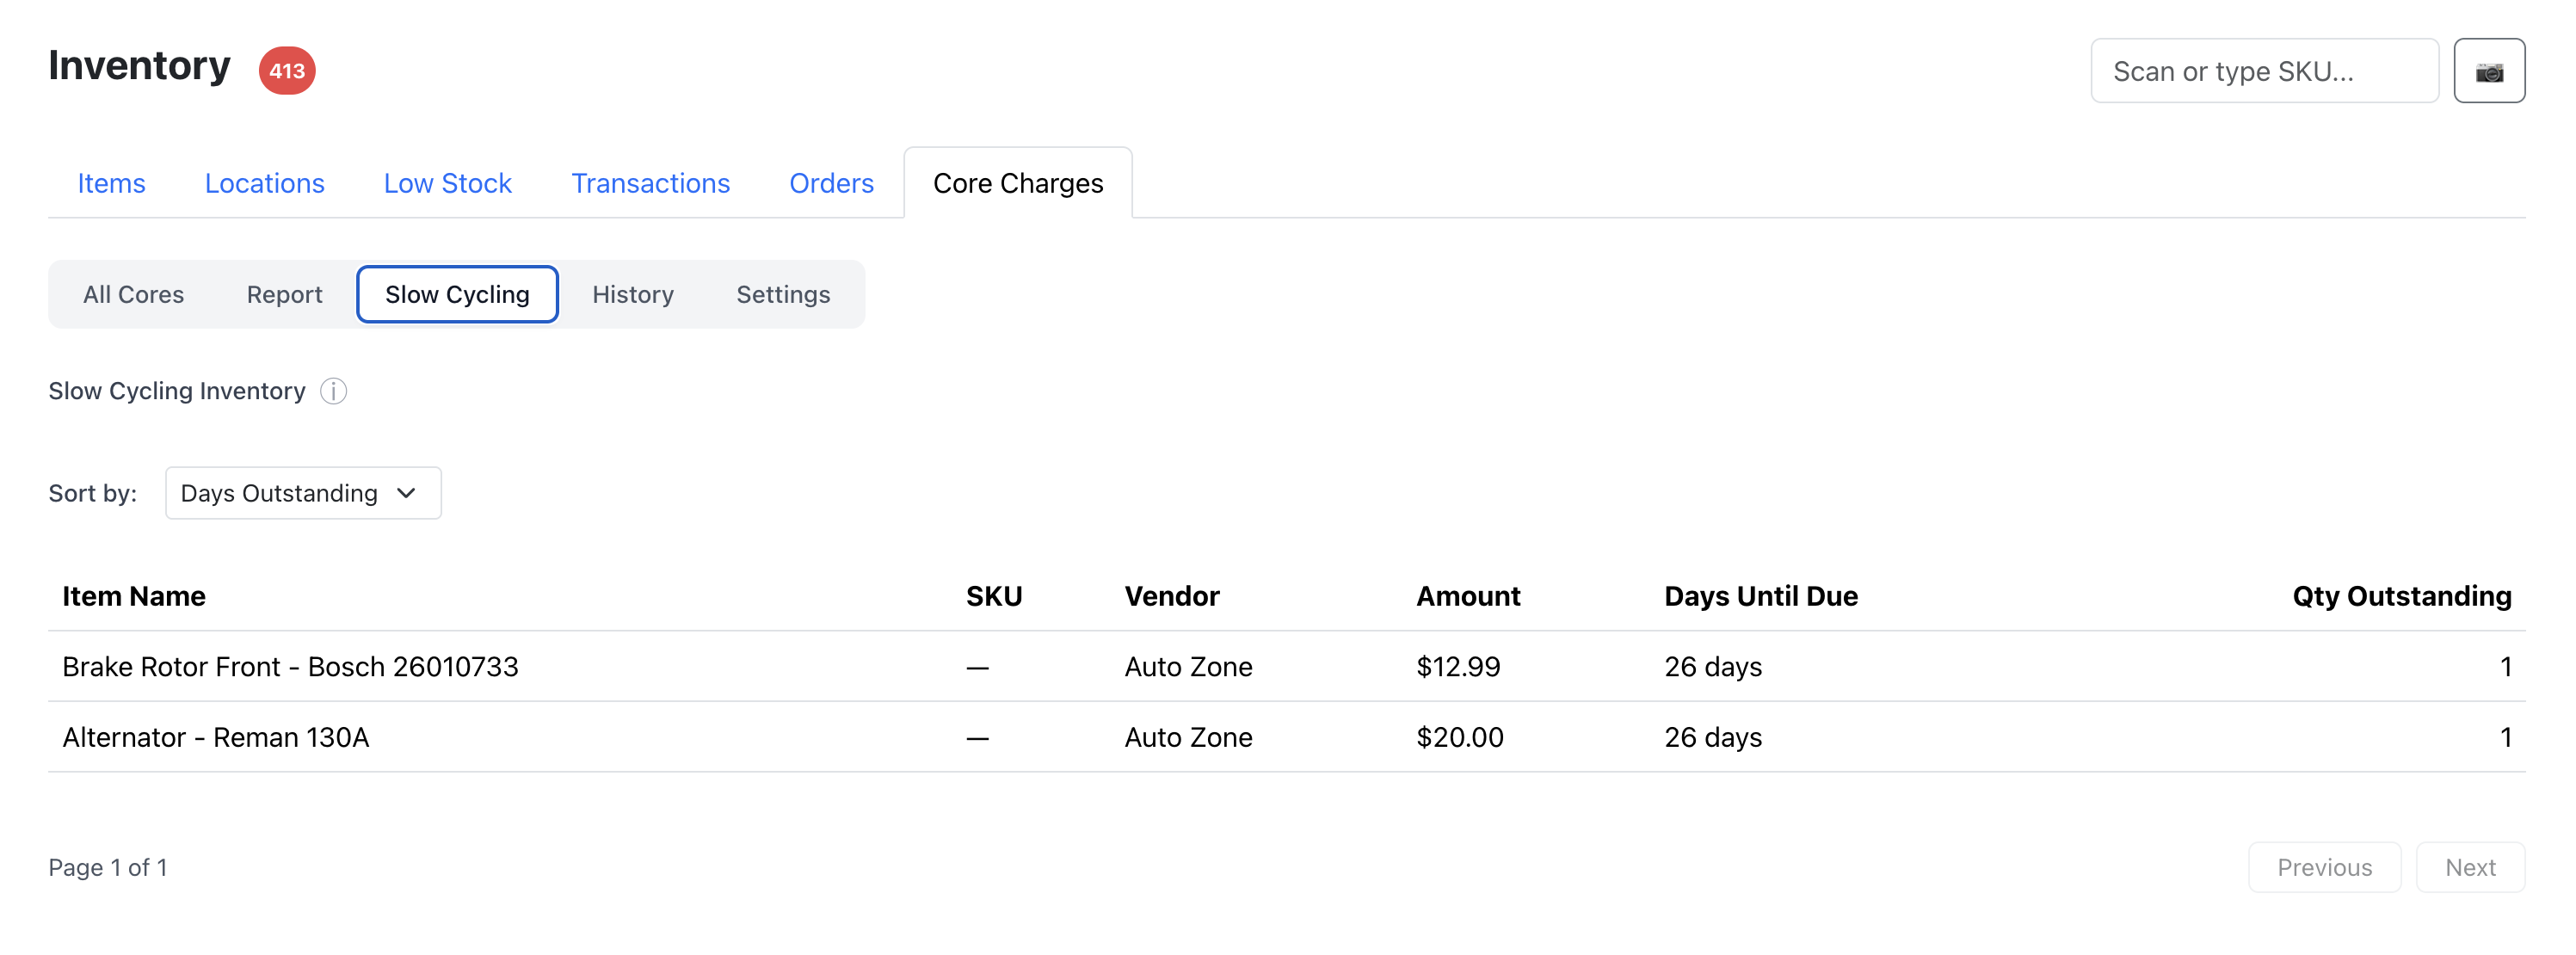
Overview: Some inventory items repeatedly generate core charges that take a long time to return. The slow-cycling view highlights these items so you can investigate root causes.
The slow-cycling list shows inventory items ranked by average days outstanding for their core charges. Items at the top have cores that sit unreturned the longest.
Using the Slow-Cycling View
- In the Core Charges tab, click Slow Cycling.
- Review items sorted by days outstanding (default) or total exposure amount.
- Click any item to see its core charge history and identify patterns.
Common causes of slow cycling:
- Old cores not being stored in an accessible location
- Vendor requires batch shipments (consolidating returns)
- Technicians not pulling the old part when installing the new one
- Parts used on jobs that stay open for extended periods
Core Charge History
Overview: The history view provides a chronological timeline of all core charge events for auditing and trend analysis.
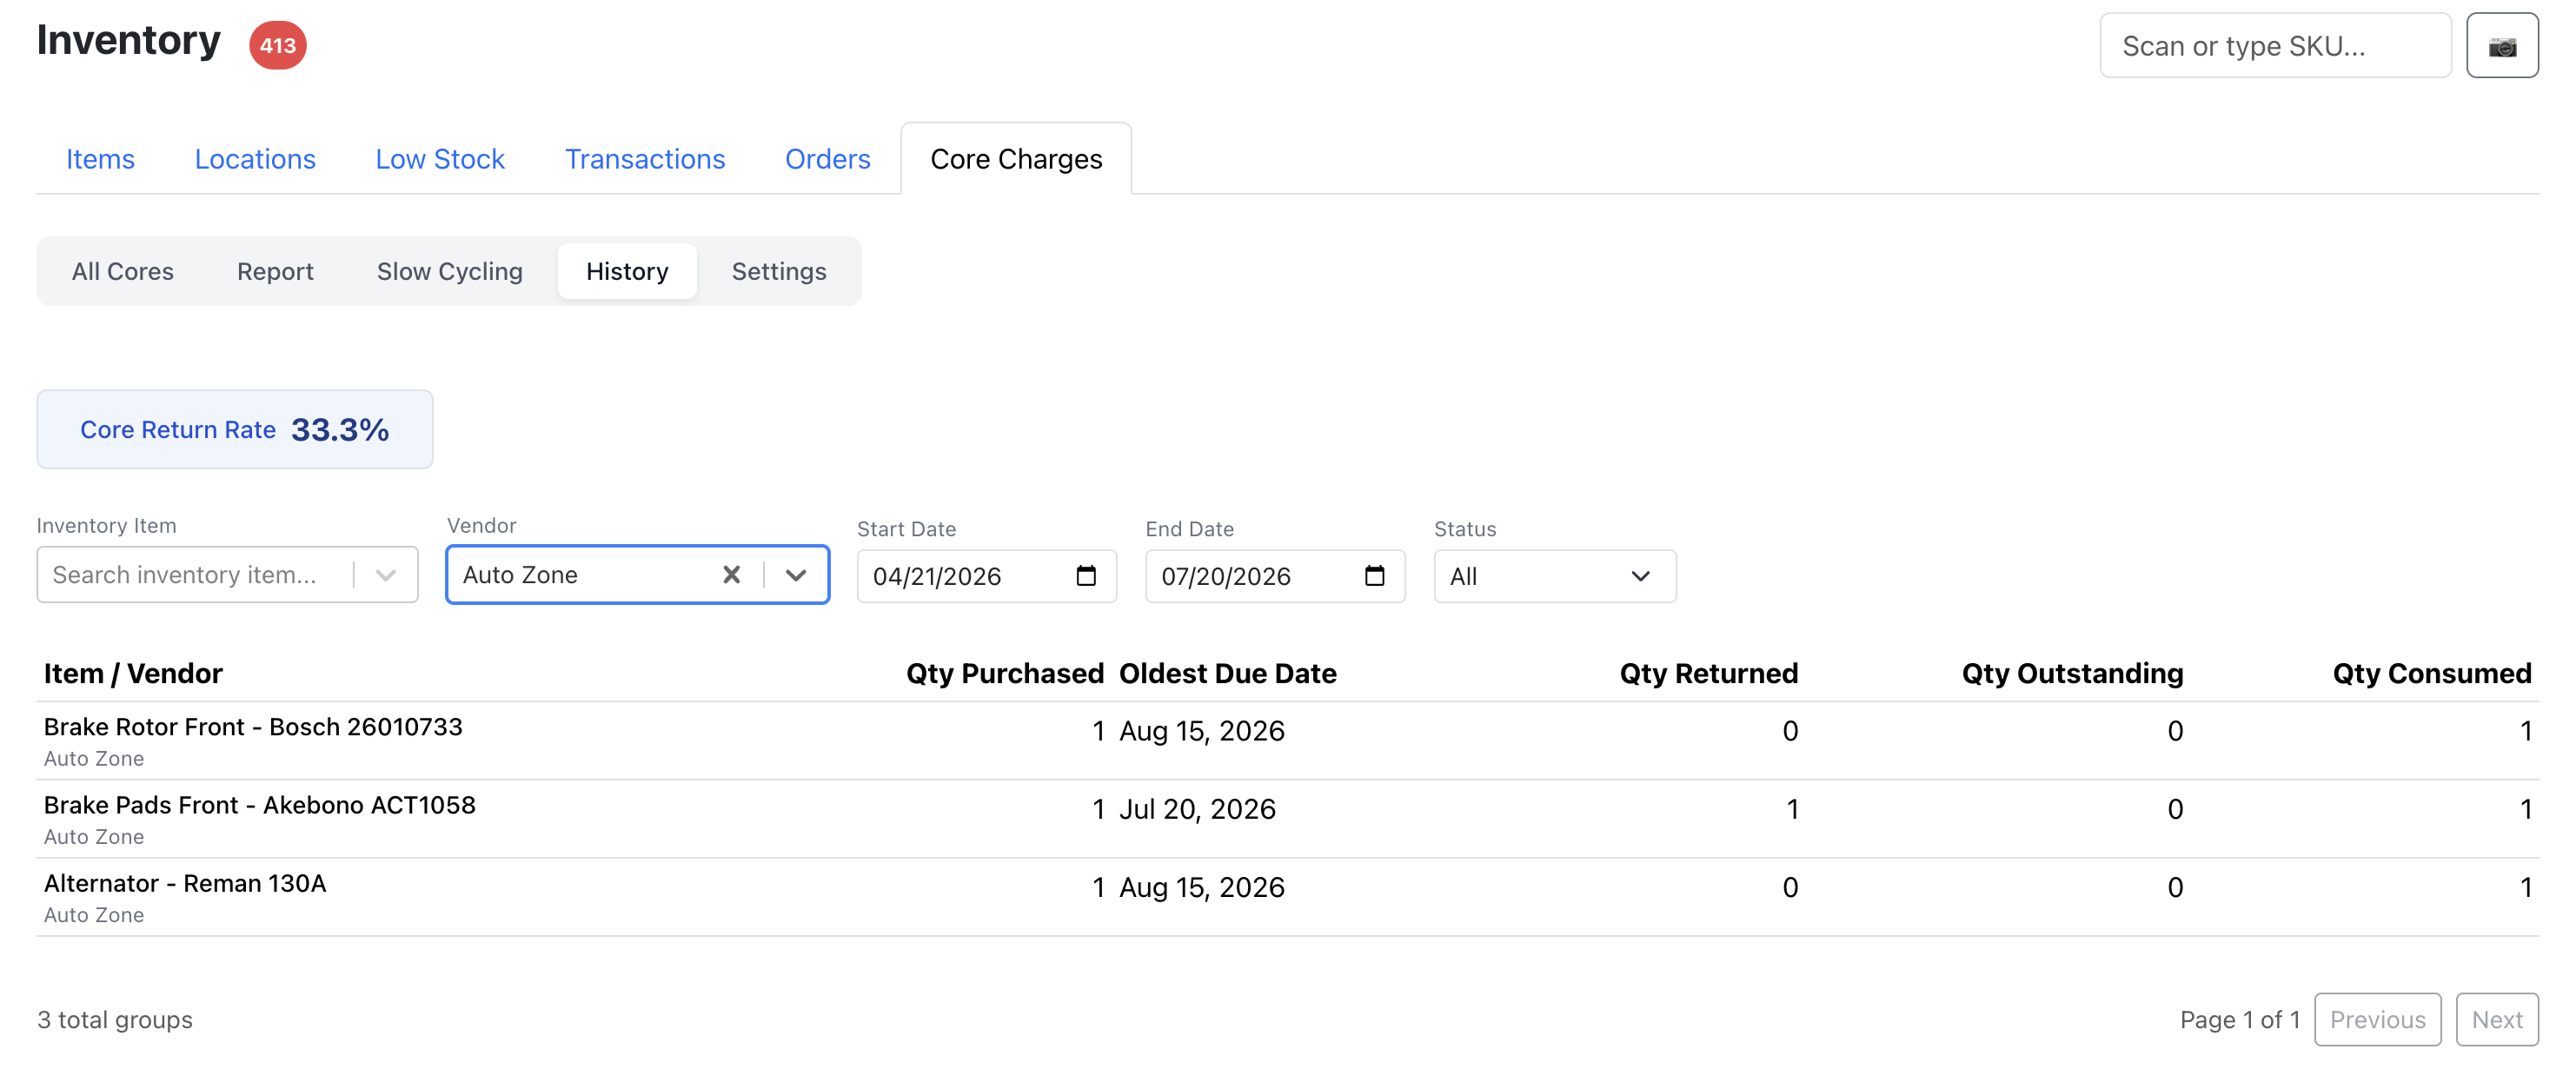
- In the Core Charges tab, click History.
- Set a date range (default: last 90 days, max: 365 days).
- Optionally filter by inventory item or vendor.
- The timeline shows every core charge event: created, returned, credit received, eligibility changes.
At the top of the history view, you'll see your core return rate — the percentage of core charges that were successfully returned and credited. A healthy shop aims for 90%+ return rate.
Use history to:
- Audit when specific cores were returned and credited
- Track return rate improvements over time
- Identify vendors with frequent rejections
- Prepare documentation for disputed credits
Settings
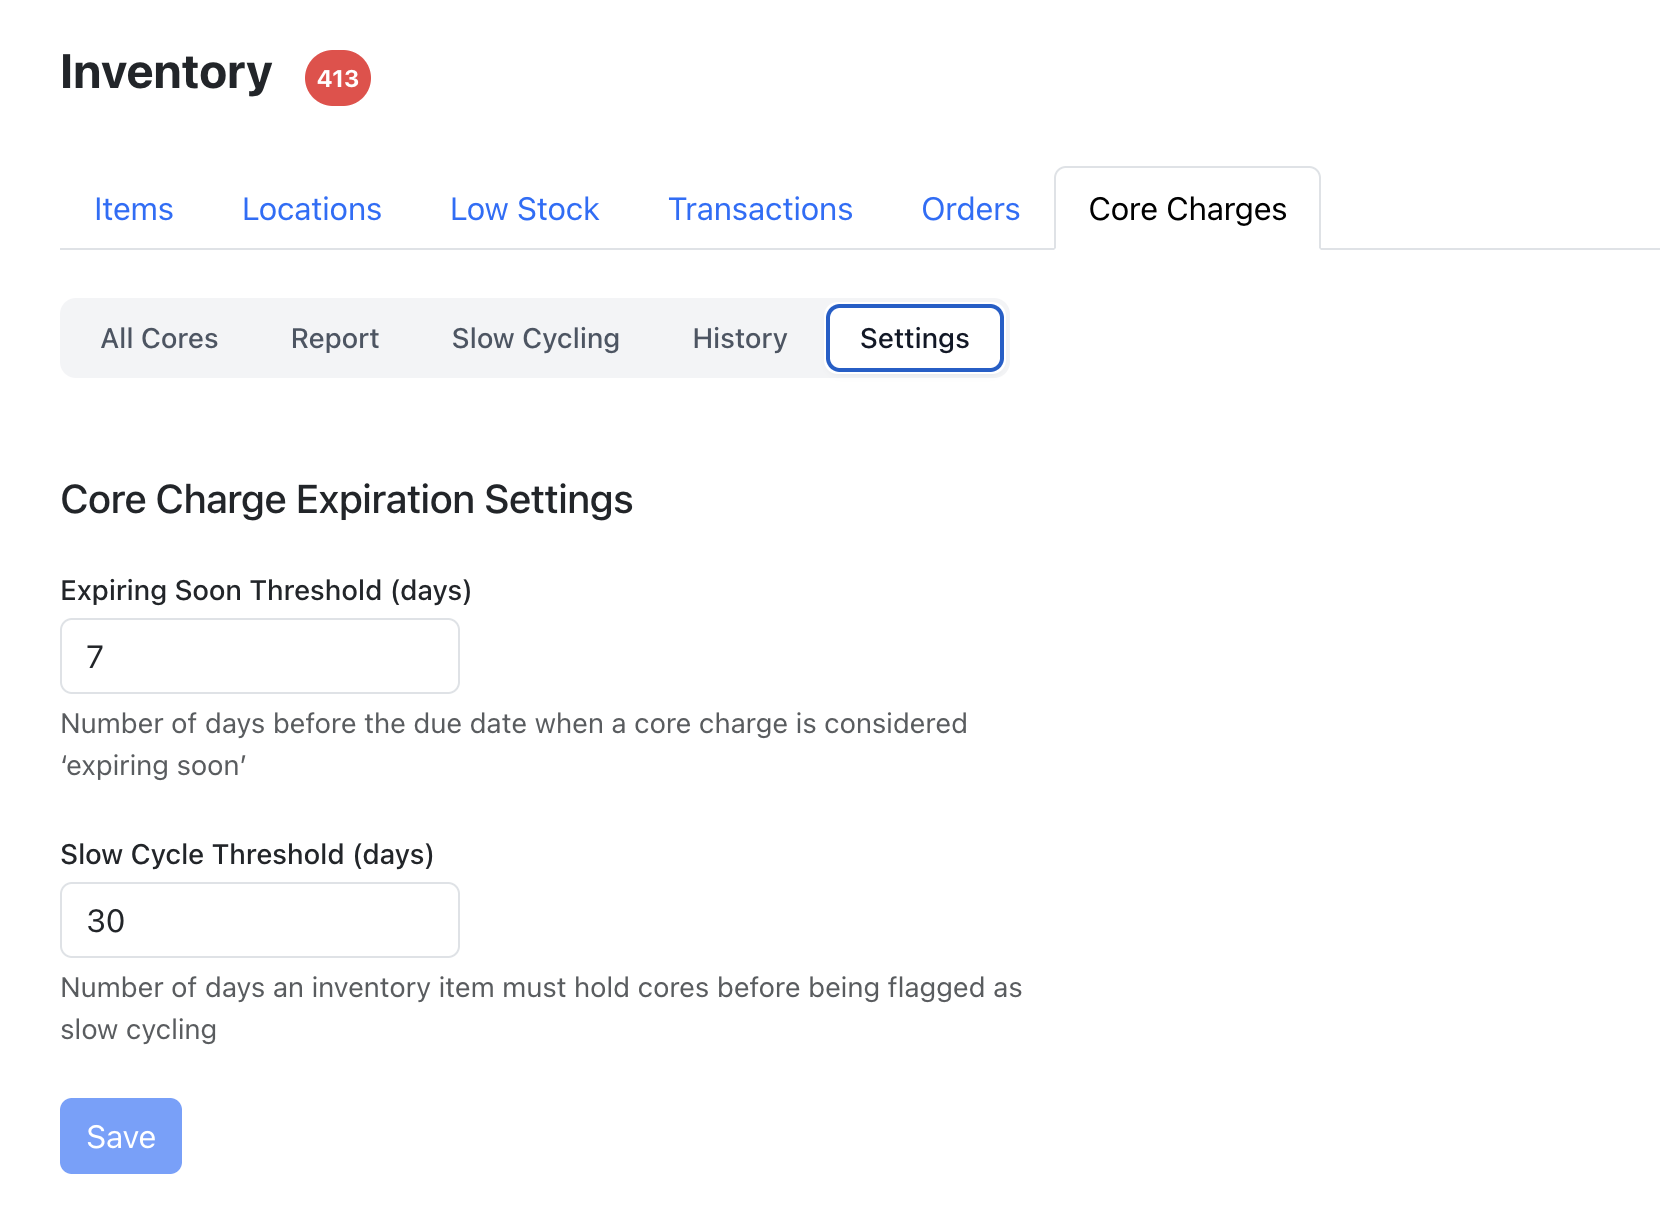
Overview: Configure how core charge alerts and thresholds work for your company.
Expiration Threshold
The "expiring soon" threshold determines how many days before the due date a core charge moves from "Active" to "Expiring Soon". The default is 7 days.
- Navigate to the Core Charges tab.
- Click Settings (gear icon).
- Set the Expiring Soon Threshold (1–365 days).
- Click Save.
A larger threshold gives you more lead time to organize returns. Shops with weekly vendor pickups may use 7 days, while shops that ship cores back themselves might prefer 14–21 days.
Tip: If you're frequently seeing cores go overdue, increase the threshold so you get earlier warnings.